A Patient’s Guide to Scheuermann’s Disease
Introduction

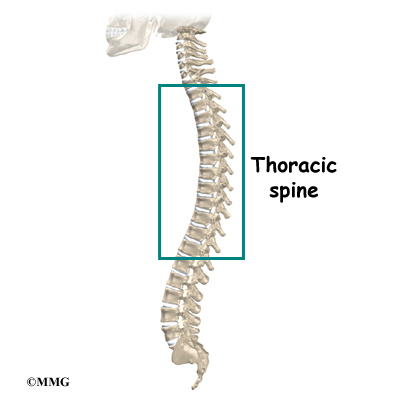
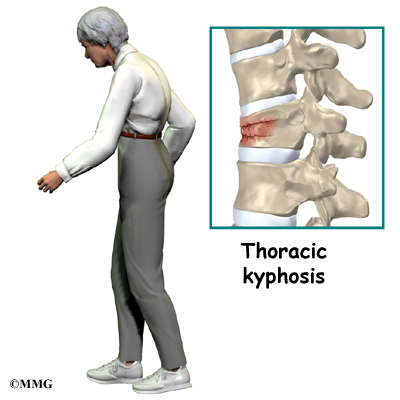
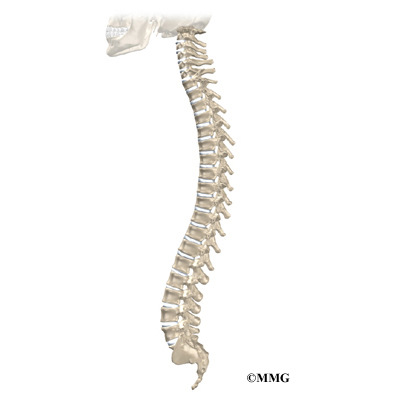
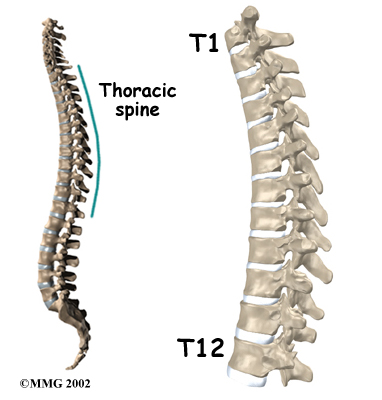
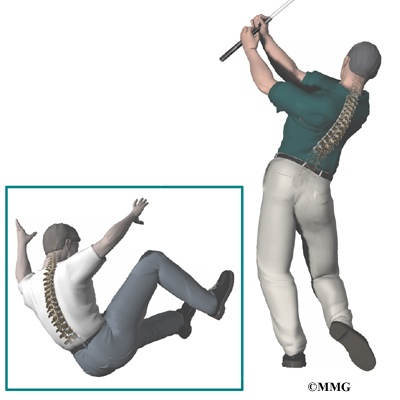
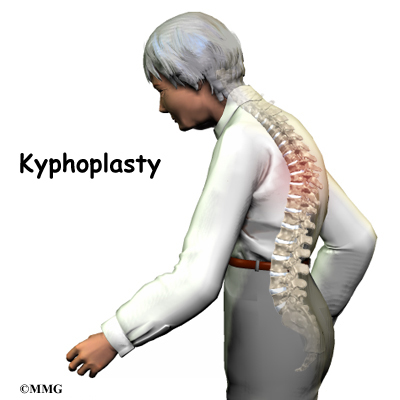
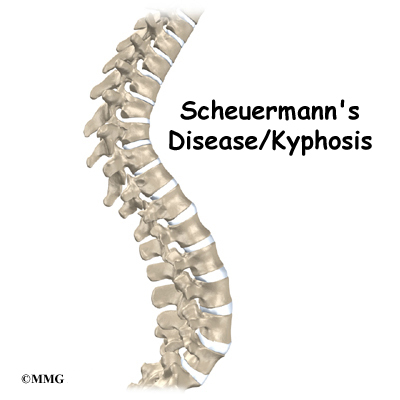
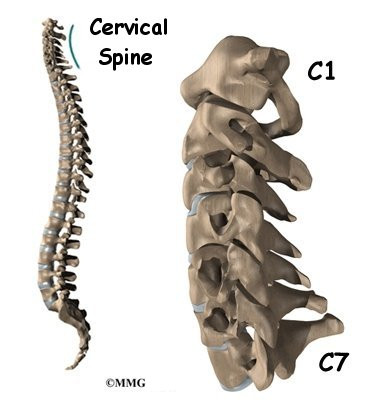
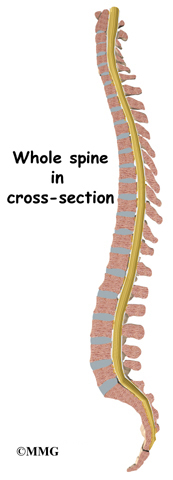
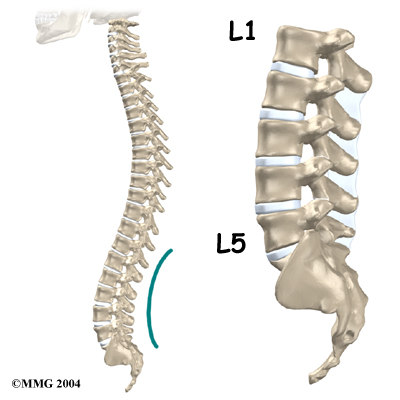
The section of spine from below the neck to the bottom of the rib cage is called the thoracic spine. From the side, the thoracic spine appears slightly rounded. Its shape is like the letter “C” with the opening facing the front of the body. This normal curve is called kyphosis. With excessive kyphosis, the thoracic spine takes on a hunchbacked appearance.
Scheuermann’s disease (also called Scheuermann’s kyphosis) is a condition that starts in childhood. It affects less than one percent of the population and occurs mostly in children between the ages of 10 and 12. It affects boys and girls with a slightly higher number of boys affected. Those who do not get proper treatment for the condition during childhood often experience back pain from the spinal deformity as adults. Sometimes Scheuermann’s disease doesn’t develop until adulthood.
This guide will help you understand
- how the problem develops
- how doctors diagnose the condition
- what treatment options are available
Anatomy
What parts of the spine are involved?
A healthy human spine has three gradual curves. From the side, the neck and low back curve gently inward. This is called lordosis. The thoracic kyphosis (outward curve) gives the mid back its slightly rounded appearance. These normal curves help the spine absorb forces from gravity and daily activities, such as lifting.
The angle of normal kyphosis in the thoracic spine varies. During the growth years of adolescence, a normal curve measures between 25 and 40 degrees. If the curve angles more than 40 degrees, doctors consider the kyphosis a deformity. In general, kyphosis tends to be more exaggerated in girls. The angle increases slightly throughout life both in women and men. Scheuermann’s disease causes the thoracic kyphosis to angle too far (more than 45 degrees).
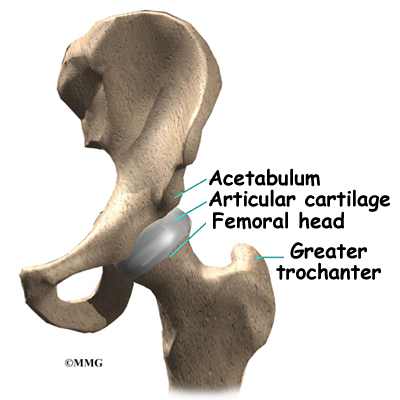
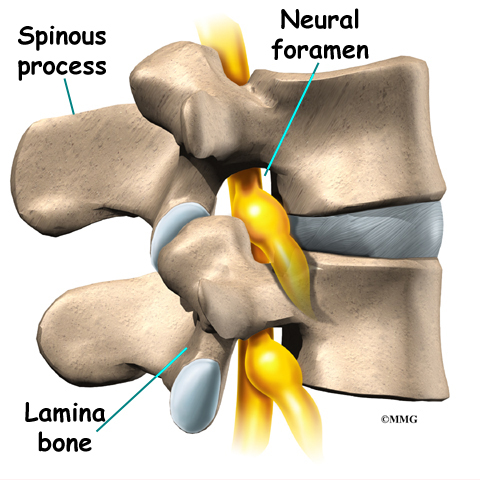
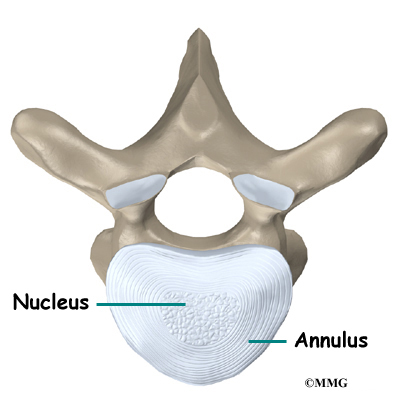
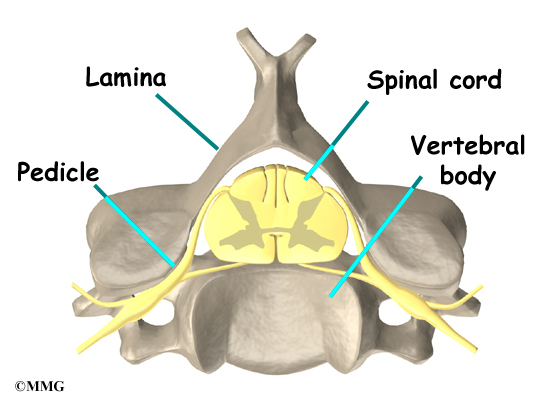
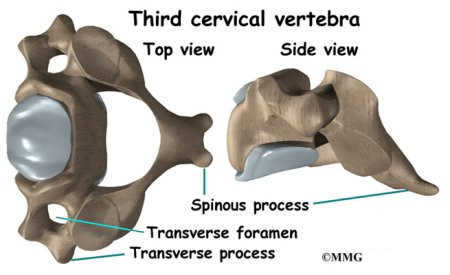
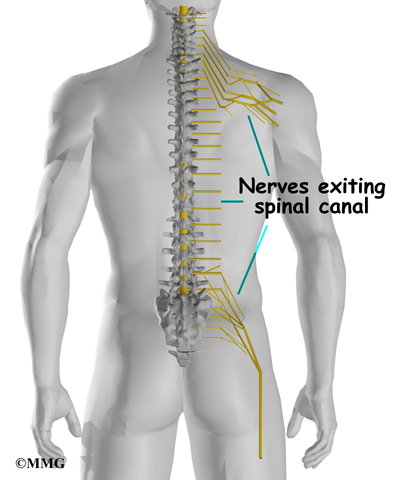
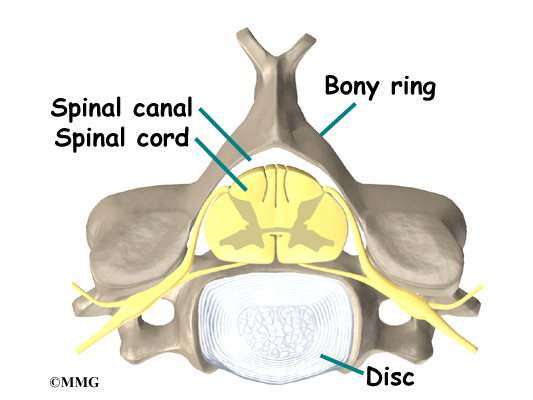
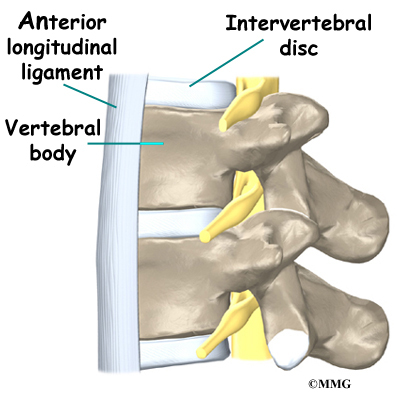
The 12 thoracic vertebrae are known as T1 to T12. The main section of each thoracic vertebra is a round block of bone, called a vertebral body. A ring of bone attaches to the back of the vertebral body. This ring surrounds and protects the spinal cord.
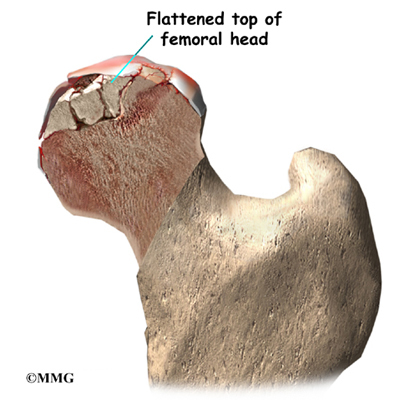
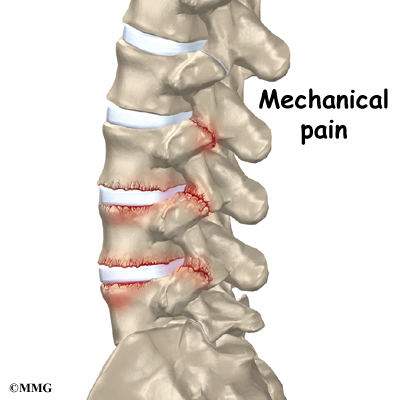
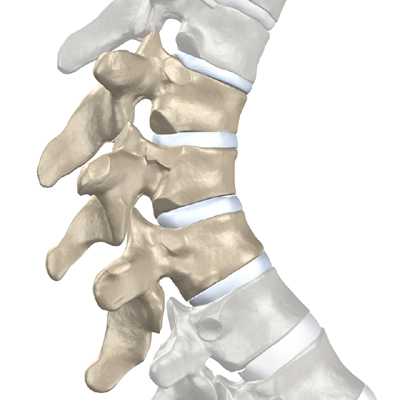
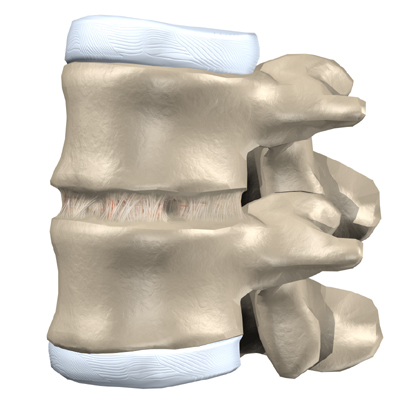
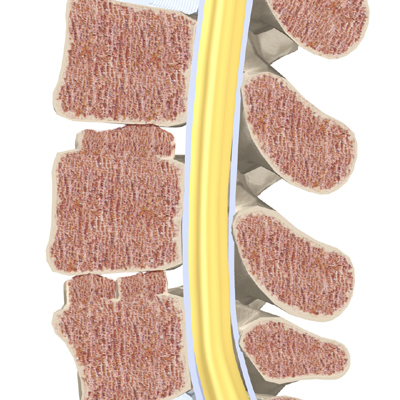
In Scheuermann’s disease, the front of the vertebral body becomes wedge-shaped, possibly from abnormal growth. This produces a triangular-shaped vertebral body, with the narrow, wedged part closest to the front of the body. The wedge puts a bigger bend in the kyphosis of the thoracic spine.
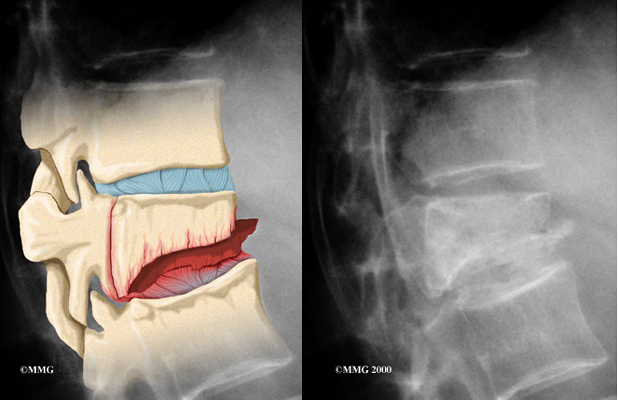
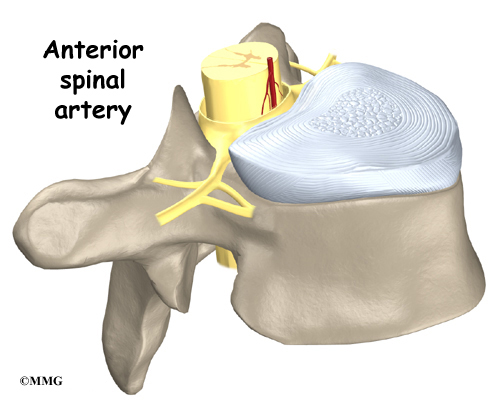
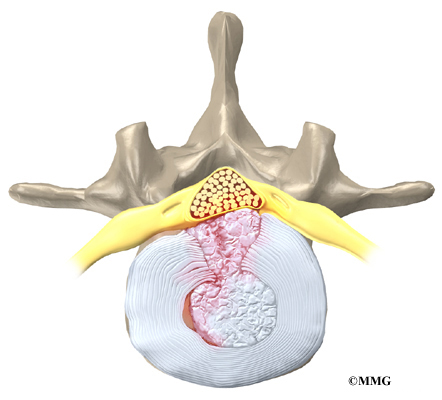
The vertebral bodies are separated by a cushion, called an intervertebral disc. Between each disc and vertebral body is a vertebral end plate. Sometimes one or more discs in patients with Scheuermann’s disease squeeze through the vertebral end plate, which is often weaker in patients with Scheuermann’s disease. This forms pockets of disc material inside the vertebral body, a condition called Schmorl’s nodes.
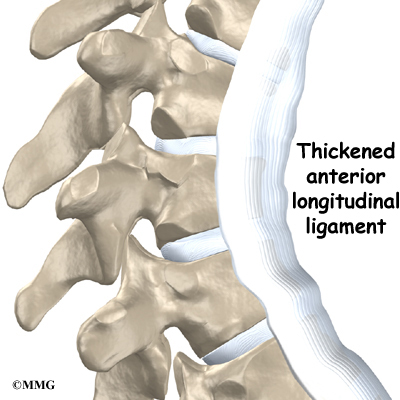
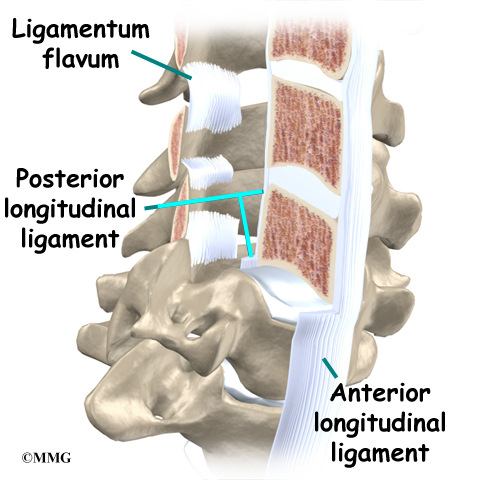
A long ligament called the anterior longitudinal ligament connects on the front of the vertebral bodies. This ligament typically thickens in patients with Scheuermann’s disease. This adds to the forward pull on the spine, producing more wedging and kyphosis.
The disease usually produces kyphosis in the middle section of the thorax (the chest), between the shoulder blades. The condition sometimes causes kyphosis in the lower part of the thoracic spine, near the bottom of the rib cage.
Related Document: A Patient’s Guide to Thoracic Spine Anatomy
Causes
Why do I have this problem?
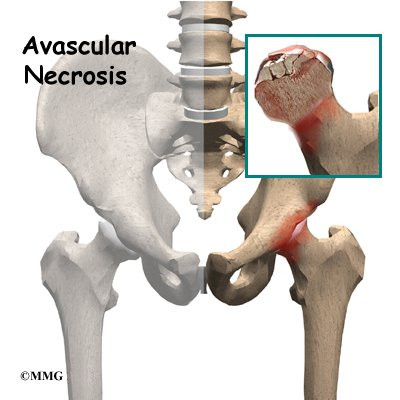
Famed for discovering this disease, Scheuermann himself thought a lack of blood to the cartilage around the vertebral body caused the wedging. Though scientists have since disproved this theory, the root cause of the disease is still unknown.
View animation
Mounting evidence suggests wedging develops as a problem vertebral body grows. During normal growth, the cartilage around the vertebral body turns evenly and completely to bone. If the change from cartilage to bone doesn’t happen evenly, one side of the vertebral body grows at a faster rate. By the time the entire vertebral body turns to bone, one side is taller than the other. This is the wedge shape that leads to abnormal kyphosis.
Other theories of how Scheuermann’s kyphosis starts include
- genetics
- childhood osteoporosis
- mechanical reasons
Genetics
Researchers have suggested that this disease can be passed down in families. Studies have shown multiple families who have passed the disease through inheritance of certain types of genes. The genetic link is uncommon but remains under investigation.
Childhood Osteoporosis
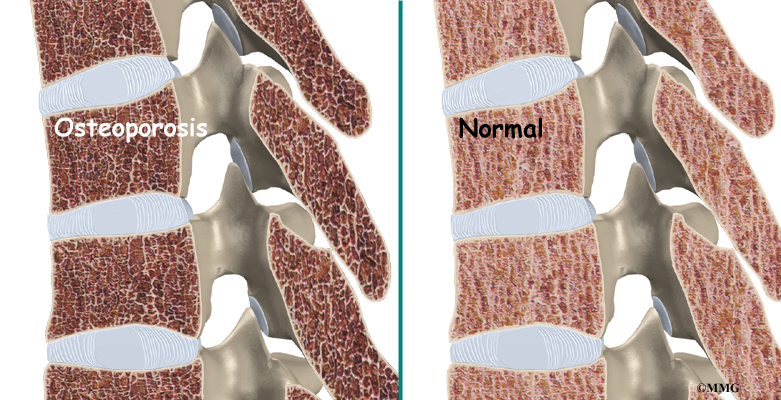
One medical study found that some patients with Scheuermann’s disease had mild osteoporosis (decreased bone mass) even though they were very young. Other studies did not show problems with osteoporosis. More research is needed to confirm the role of osteoporosis in Scheuermann’s disease.
Related Document: A Patient’s Guide to Osteoporosis
Mechanical Reasons
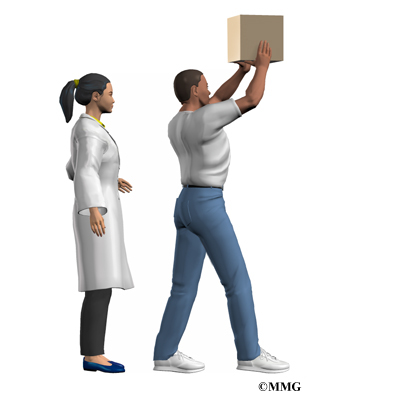
These include strains from bending, heavy lifting, and using poor posture. This theory makes sense because the back braces used in treating kyphosis work. If a back brace can straighten a bent spine, then perhaps mechanical forces could cause more kyphosis than naturally occurs in the spine. (Back braces are discussed in more detail later.) Some experts think that tight hamstring muscles (along the back of the thigh) pull on the pelvis contributing to spinal deformity.
Scientists are not convinced that mechanical reasons cause the disease; rather, these factors likely aggravate the condition. And in some cases, it is difficult to tell which came first: the mechanical changes causing the deformity or the deformity resulting in the anatomical and thus mechanical changes.
Other Reasons
Other theories put forth that might help explain the cause(s) of Scheuermann’s disease include biochemical changes in the collagen that make up the end-plates altering bone growth, above-average disc height, and increased levels of growth hormone.
Symptoms
What does the condition feel like?
Hunched posture or a round back in children usually alerts parents or teachers to the need for a doctor visit. Children don’t typically complain of back pain or other symptoms.
This is not the case in adolescents who are nearing puberty and have kyphosis in the lowest part of the thorax, near the bottom of the rib cage. In these patients, back pain is the overriding problem. This happens most often to young, active males. Doctors suspect this unique form of the disease occurs because the condition is overlooked during childhood, delaying treatment.
Adults who’ve lived with the hunched posture for many years may note worsening pain. They may be disturbed by the physical changes and deformity that develop.The pain and/or the physical changes typically causes them to seek medical help.
Besides having a forward curved spine, most people affected by Scheuermann’s report back pain, stiffness, and loss of flexibility. The neck and low back try to compensate by increasing the natural lordotic curves in these two areas. Since the person cannot straighten the thoracic spine, the cervical and lumbar spines increase their curves to compensate for the round back. All of these changes in posture are usually accompanied by tight shoulder, hip, and leg muscles.
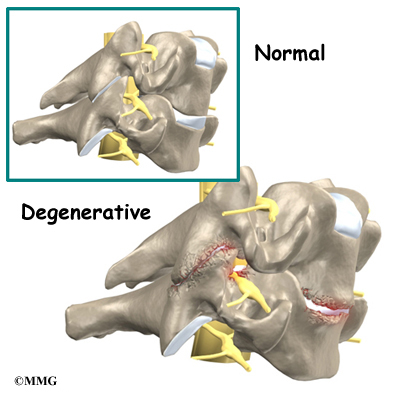
Degenerative spondylosis is also reported as part of the natural history in middle-aged adults with Scheuermann’s kyphosis. Degenerative changes in the spine (usually from aging) can cause bone spurs to form around the spinal joints. The joint spaces start to narrow. This condition is called spondylosis, which can also contribute to pain and stiffness.
Patients of all ages who experience pain generally report feeling discomfort along the sides of the spine, slightly below the main part of the abnormal curve.
Exaggerated kyphosis can lead to an increased lordosis (inward curve) in the low back. This puts extra strain on the tissues of the low back. Over many years, this added wear and tear may produce low back pain. This mainly occurs in adults who have extra lumbar lordosis from years of untreated Scheuermann’s disease.
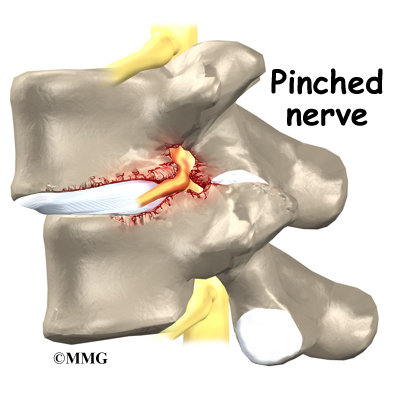
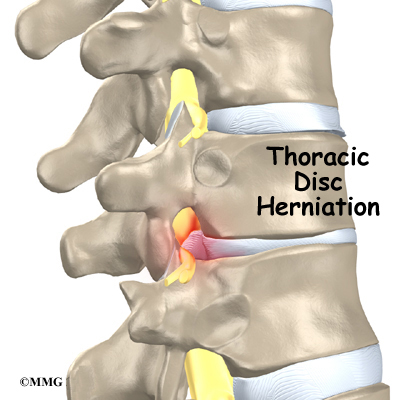
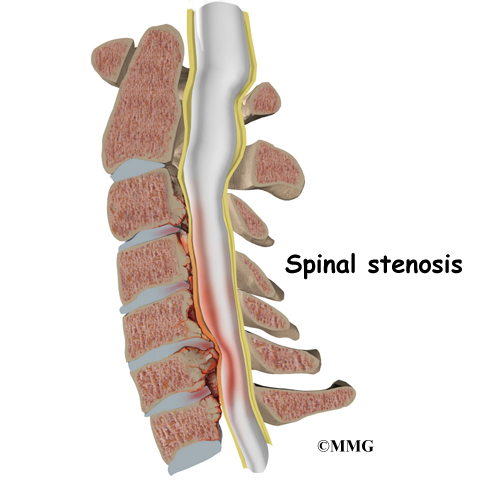
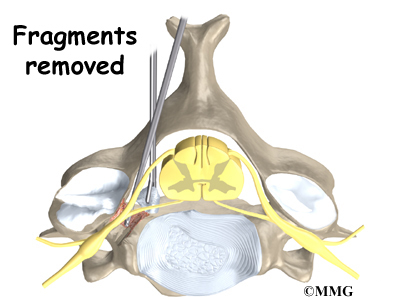
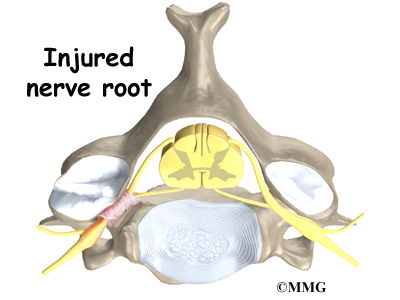
In rare cases, the spinal cord is affected. A severe kyphosis stretches the spinal cord over the top of the curve. This can injure the spinal cord. Also, patients with Scheuermann’s disease have a greater chance of having a herniated thoracic disc. This is where the disc material from inside the disc begins to squeeze out and press on the spinal cord. Spinal cord symptoms for both situations include sensations of pins and needles and numbness. The leg muscles may feel weak. Symptoms from an injured spinal cord can also include changes in bowel and bladder function.
Related Document: A Patient’s Guide to Thoracic Disc Herniations
When the kyphosis angle exceeds 100 degrees (rare), the sharply bent spine puts pressure on the heart, lungs, and intestines. When this occurs, patients may tire quickly, suffer shortness of breath, feel chest pain, and lose their appetite.
Diagnosis
How do doctors diagnose the problem?
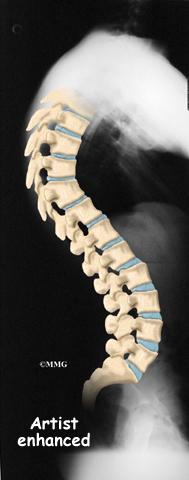
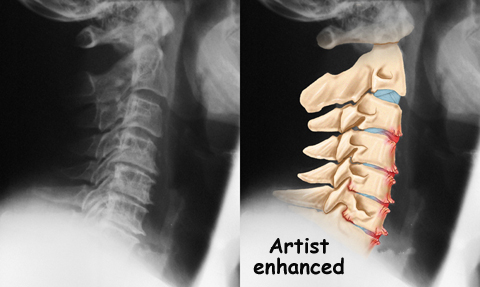
Doctors start with a complete history and physical examination. However, X-rays are the main way to diagnose Scheuermann’s kyphosis. Taken from the side, an X-ray may show vertebral wedging, Schmorl’s nodes, and changes in the vertebral end plates. Doctors use X-ray images to measure the angle of kyphosis. Doctors diagnose Scheuermann’s disease when three vertebrae in a row wedge five degrees or more and when the kyphosis angle is greater than 45 degrees.
Scheuermann’s disease or kyphosis is diagnosed as either being typical (Type I) or atypical (Type II). These two forms of the disease affect different parts of the spine. The typical form (most common type) has the thoracic kyphotic pattern described in this section. The lower (lumbar) spine compensates by becoming hyperlordotic. Lordosis is the spinal curve exactly opposite of kyphosis. Hyperlordotic means the curve increases beyond what is considered “normal.”
The atypical form of Scheuermann’s (Type II) affects the low back known as the lumbar spine. The upper lumbar spine (where the thoracic spine transitions to become the lumbar spine) is involved. Type II is seen most often in young boys before puberty who are active in sports activities. They experience pain that goes away with rest and change in position or activity level.
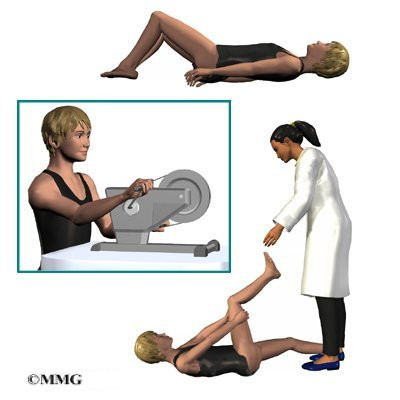
A side-view X-ray can also show if the spine is flexible or rigid. Patients are asked to bend back and hold the position while an X-ray is taken. The spine straightens easily when it is flexible. In patients with Scheuermann’s disease, however, the curve stays rigid and does not improve by trying to straighten up.
From the front, X-rays show if the spine curves from side to side. This sideways curve is called scoliosis and occurs in about one-third of patients with Scheuermann’s kyphosis.
X-rays can show signs of wear and tear in adults who have extra lumbar lordosis from years of untreated Scheuermann’s disease.
Computed tomography (a CT scan) may be ordered. This is a detailed X-ray that lets doctors see slices of the body’s tissue.
Myelography is a special kind of X-ray test. For this test, dye is injected into the space around the spinal canal. The dye shows up on an X-ray. This test is especially helpful if the doctor is concerned whether the spinal cord is being affected.
Magnetic resonance imaging (MRI) uses magnetic waves rather than X-rays to show the soft tissues of the body. This machine creates pictures that look like slices of the area the doctor is interested in. The test does not require special dye or a needle.
Treatment
What treatment options are available?
Nonsurgical Treatment
A child or youth with mild kyphosis may simply need to be observed. Unless the curve or pain becomes worse, no other treatment may be needed. Some children who don’t require treatment eventually improve and have no long-term problems. Others may always have a mild thoracic kyphosis but are able to function normally without pain or other problems.
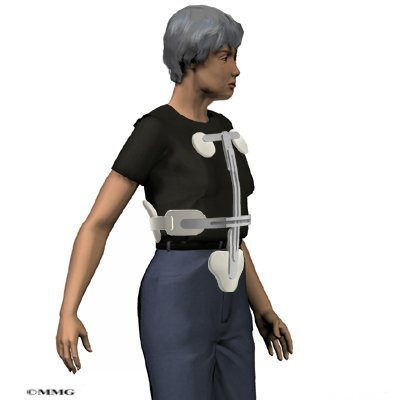
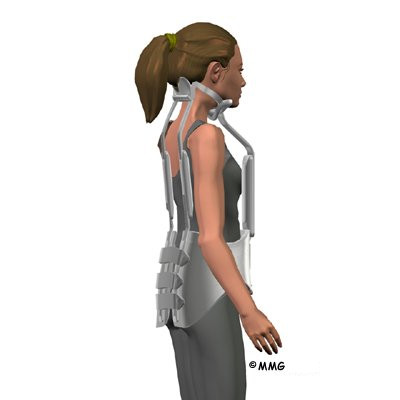
If the doctor is concerned that the curve will worsen, he or she may suggest bracing and exercise. A brace is most effective when used before the skeleton matures at about age 14. Doctors commonly chose a Milwaukee brace, which is designed to hold the shoulders back and gradually straighten the thoracic curve. The brace won’t reverse the curve in a fully developed spine. Nor is it helpful for rigid curves that angle more than 75 degrees.
The Milwaukee brace is made of molded plastic that conforms to the waist. On the back, two upright, padded bars line up along the sides of the spine. Pressure from the upright bars straightens the spine. Patients usually remove the brace to shower, but they keep it on at night.
Younger patients (under 15) generally wear the brace all the time. The doctor adjusts the brace regularly as the curve improves. When the thoracic curve has improved enough, the brace is worn part-time (eight to 12 hours per day) until the skeleton is done growing, typically around age 14 or 15.
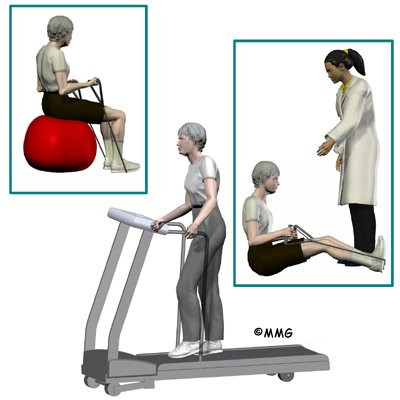
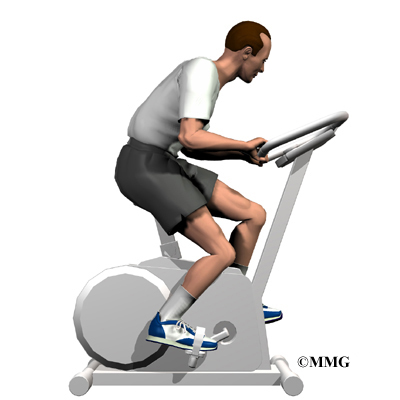
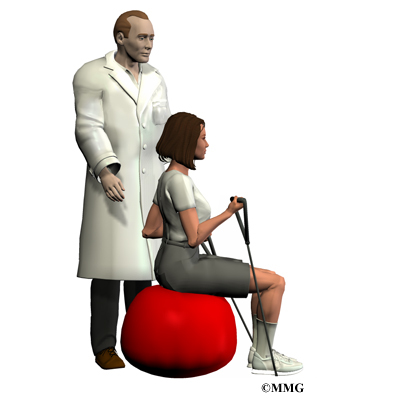
A physical therapist may show the patient recommended exercises. When used in combination with a brace, exercises appear to maximize the effect of the brace by strengthening muscles that help align the spine. Certain exercises, such as general conditioning and stretching, are also worthwhile for helping patients control pain. Core training for spinal stabilzation is an important part of the pain management program. However, exercises alone don’t reduce kyphosis in Scheuermann’s disease.
Doctors may prescribe anti-inflammatory medication for pain. Younger patients generally use this medicine on a short-term basis, in combination with other treatments. Adults who have ongoing pain sometimes require long-term use of anti-inflammatory medication. Sometimes adults obtain partial correction of the kyphosis and pain relief with bracing even though they have reached full bone growth. Bracing for pain relief in adults is also considered when surgery is not an option.
Surgery
Surgeons rarely recommend fusion surgery for Scheuermann’s disease. Certain situations may require it, however. For example, surgery may be needed if pain becomes severe and doesn’t go away with nonoperative treatment or if pressure on the spinal cord or spinal nerves is causing problems. Some people request surgery if the deformity is severe enough that their appearance causes them considerable psychologic and/or emotional distress.
Patients whose skeletons are done growing may require surgery. Patients with a rigid kyphosis that angles more than 75 degrees may also need surgery. The entire length of the kyphosis is fused.
Two procedures commonly used to treat thoracic kyphosis are
- posterior fusion
- combined fusion
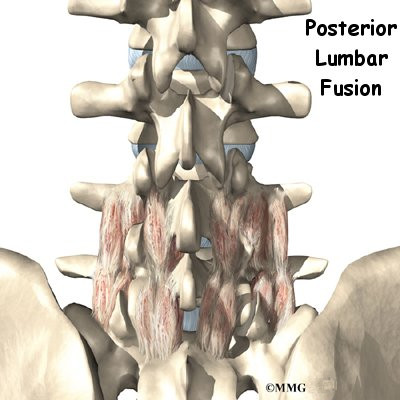
Posterior Fusion
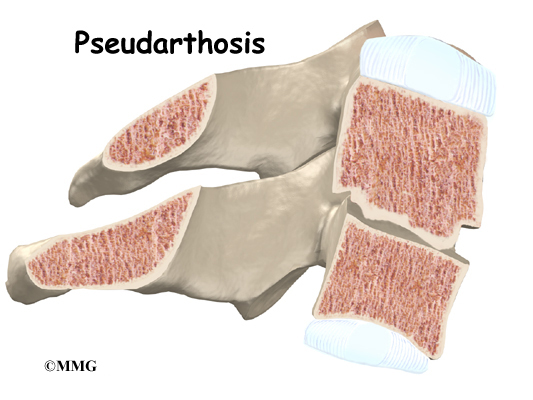
In a fusion operation, two or more bones are joined into one solid bone. Surgeons perform posterior fusion for Scheuermann’s disease on the rare patient who prefers not to use a brace and whose spine is still growing, is mildly flexible, and has a kyphosis of less than 65 degrees.
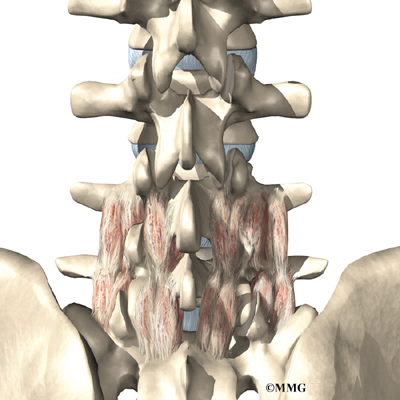
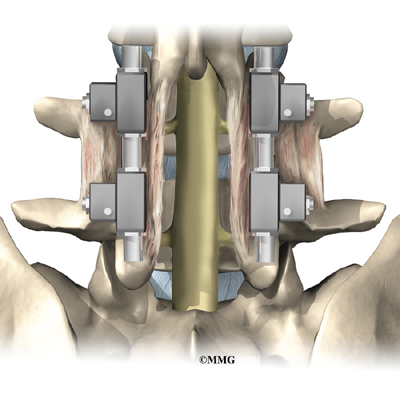
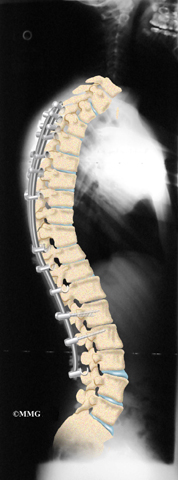
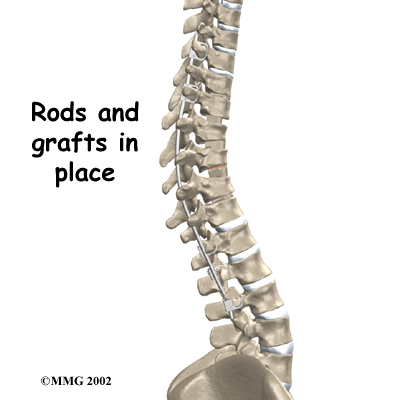
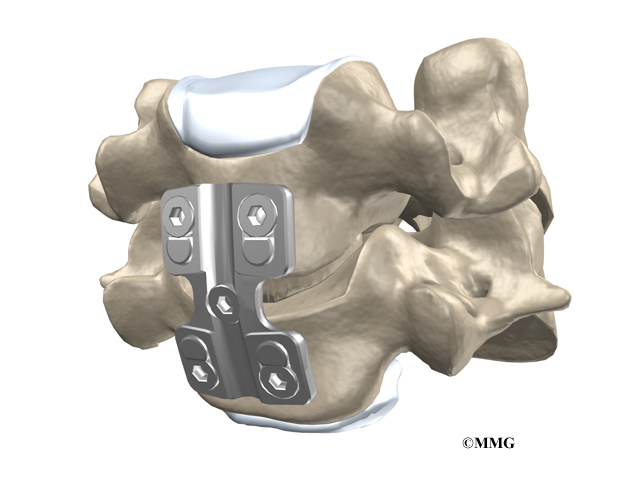
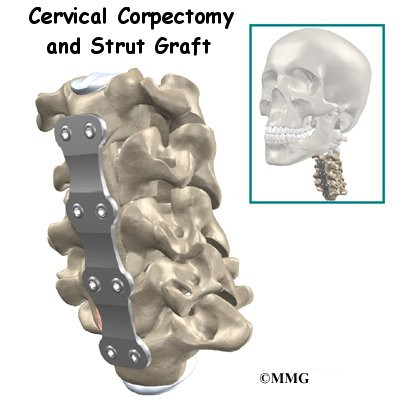
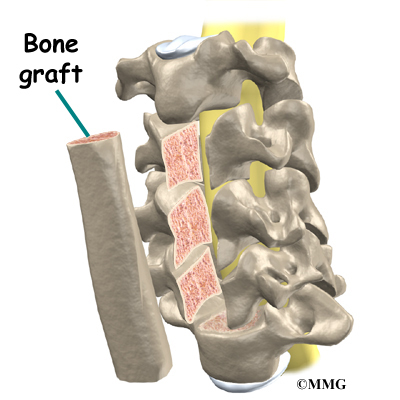
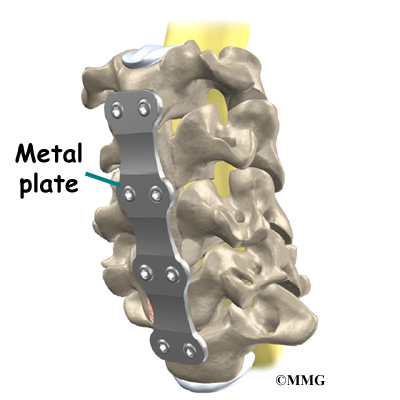
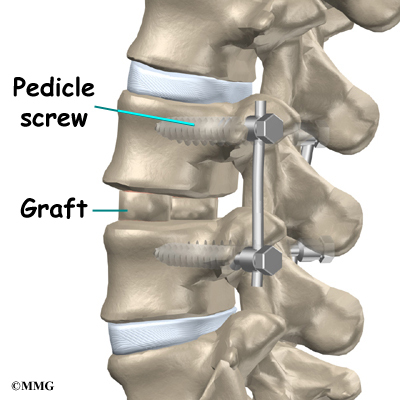
This surgery is done through the back (posterior) of the spine. After making an incision in the back, the surgeon applies pressure to straighten the kyphosis. Small strips of bone graft are then laid over the back of the spinal column. These strips encourage the bones to grow together. Metal rods are attached along the spine to prevent the vertebrae from moving. The rods hold the spine in better alignment and protect the bone graft so it can heal better and faster.
The posterior-only approach has the advantage of less blood loss than an anterior approach and does not interfere with major anterior blood supply to the spinal cord. Surgical time is shorter with the posterior-only method. Improved instrumentation and surgical technique has improved results for posterior-only fusions. Many more surgeons are using this approach with fewer problems even with more rigid curves.
Combined Fusion
Combined fusion is actually two fusion surgeries, one from the back (posterior) and one from the front (anterior) of the spine. In the past, two separate operations were needed, but now some surgeons do both fusions in the same operation. This surgery is commonly used if the spine is finished growing and the kyphosis angle is more than 75 degrees.
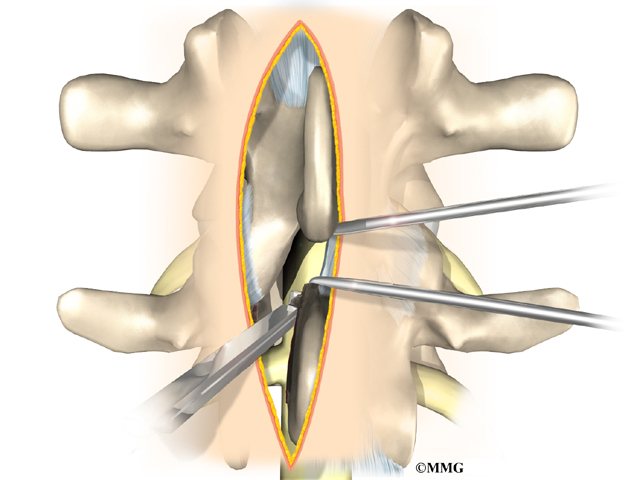
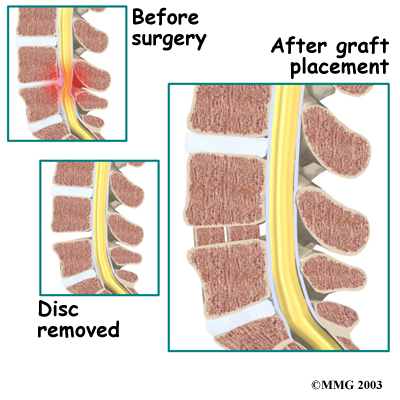
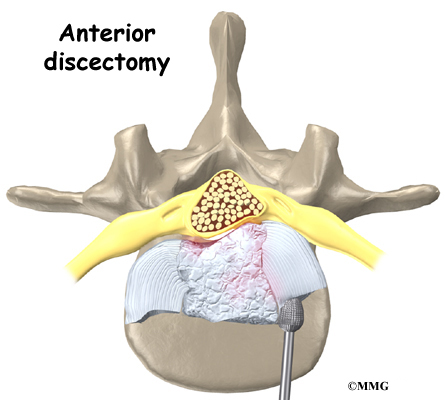
The surgeon starts with anterior fusion. With the patient on his or her side, the surgeon cuts away a piece of rib to make a small opening on the side of the thorax. The rib opening is spread apart so the surgeon can reach the spine better. The surgeon operates on the front of the spine through the chest cavity.
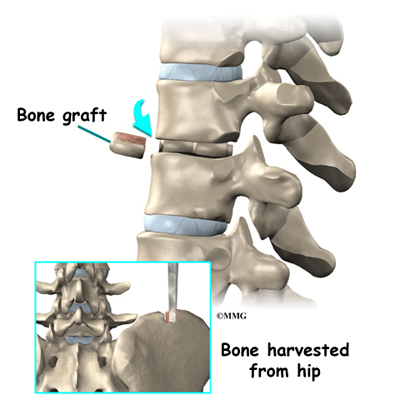
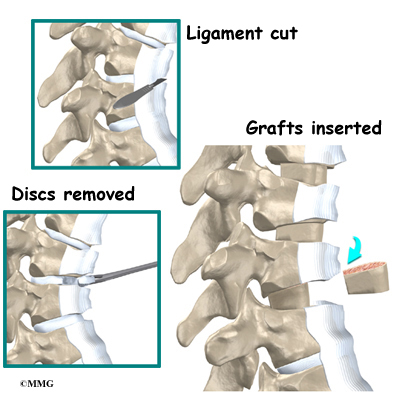
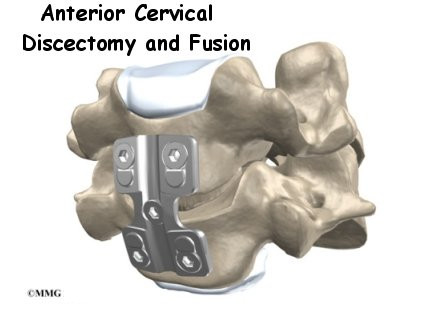
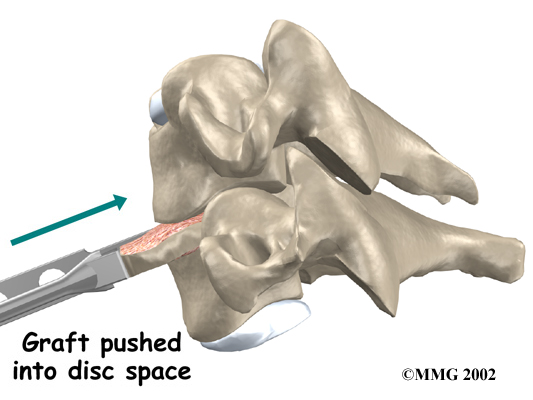
A section of the anterior longitudinal ligament is cut. This makes it easier to straighten the hunched spine. The intervertebral discs in the problem area are taken out, and the spaces between the wedged vertebrae are filled with bone graft. One method is to take a graft of bone from the pelvis and tamp it into the place of each removed disc. This requires another incision over one side of the pelvis. A second method is to grind up the piece of rib that was removed and place it in the disc spaces. As the grafts heal, the vertebrae become fused into solid bone.
The second part of surgery is an involved form of posterior fusion using special rods and hooks. This part of the operation can be done right after the anterior fusion or scheduled for one week later.
First, the surgeon makes an incision over the back of the spine. The skin and muscles are spread apart.
Then strips of bone graft are laid across each vertebra to be fused. Long rods are inserted along the sides of the spine. The rods have hooks attached on both ends. Wire is wrapped between the top and bottom hooks. Tightening the wires causes the spine to straighten. The rods help hold the spine steady as the bone grafts heal. The rods are usually left in permanently.
Rehabilitation
What should I expect as I recover?
Nonsurgical Rehabilitation
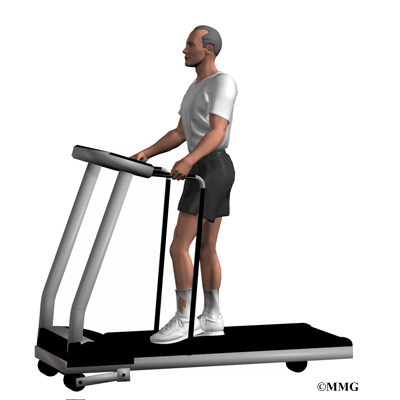
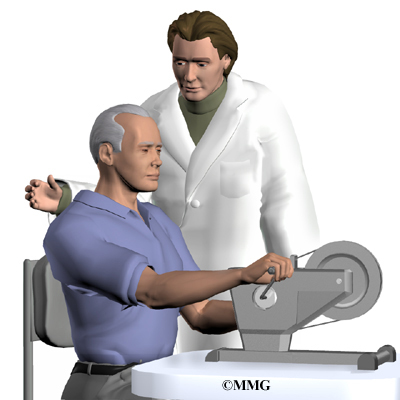
Children and adolescents treated nonsurgically sometimes work with a physical therapist. Certain exercises are beneficial when used in combination with a brace. Upper back exercises, such as gentle back bends (extension) can improve posture and prevent the spine from slouching forward. Hamstring stretches and pelvis exercises improve posture by preventing extra lordosis in the low back. Aerobic exercise improves heart and lung health and combats pain.
Pain is also addressed by the physical therapist. The therapist may apply heat, cold, ultrasound, and massage treatments. Adults who’ve had kyphosis for many years (and the resulting low back pain from too much lordosis) benefit from postural exercises to reduce the lumbar curve, followed by stabilization exercises to help them keep better posture. Patients benefit most when these exercises are done regularly and for a lifetime.
After Surgery
Rehabilitation after surgery is more complex. Although some patients leave the hospital shortly after surgery, some surgeries require patients to stay in the hospital for a few days. Soon after surgery, a physical therapist may visit patients who stay in the hospital. The treatment sessions help patients learn to move and do routine activities without putting extra strain on the back.
During recovery from surgery, patients should follow their surgeon’s instructions about wearing a back brace or support belt. They should be cautious about overdoing activities in the first few weeks after surgery.
Many surgical patients also need physical therapy outside of the hospital. Patients normally wait up to three months before beginning a rehabilitation program after fusion surgery for Scheuermann’s disease. They typically need to attend therapy sessions for eight to 12 weeks. Full recovery may take up to eight months.
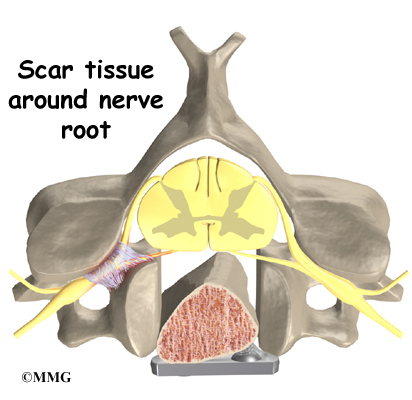
Upon completing physical therapy, patients are in charge of doing their exercises as part of an ongoing home program. Final results are overall favorable following surgery. The majority of patients report being satisfied with their cosmetic appearance. Some patients even experience complete relief from their pain. There may be some low back pain or discomfort with strenuous activity. Complications are rare but can include infection, loss of correction, spinal cord injury or other neurologic problems. In a small number of cases, a second surgical procedure may be required.