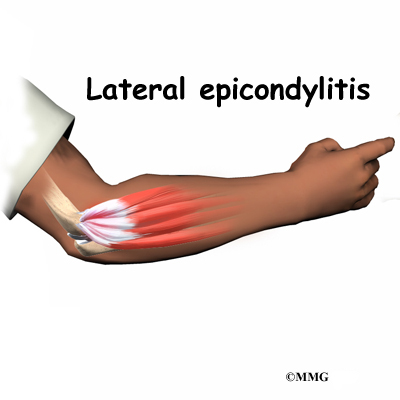
A Patient’s Guide to Medial Epicondylitis (Golfer’s Elbow)
Introduction
Medial epicondylitis is commonly known as golfer’s elbow. This does not mean that only golfers have this condition. But the golf swing is a common cause of medial epicondylitis. Many other repetitive activities can also lead to golfer’s elbow: throwing, chopping wood with an ax, running a chain saw, and using many types of hand tools. Any activities that stress the same forearm muscles can cause symptoms of golfer’s elbow.
This guide will help you understand
- what parts of the elbow are affected
- what causes golfer’s elbow
- how to make the pain go away
Anatomy
What parts of the elbow are affected?
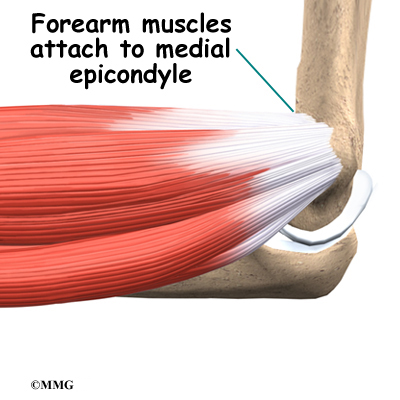
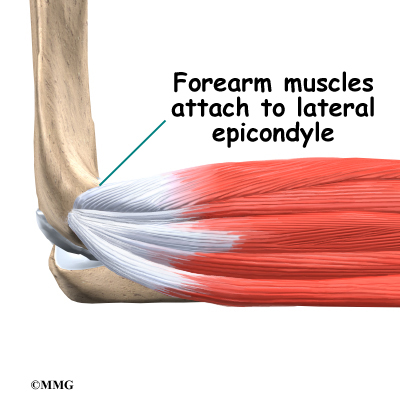
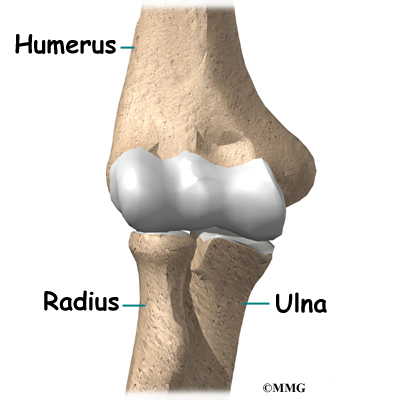
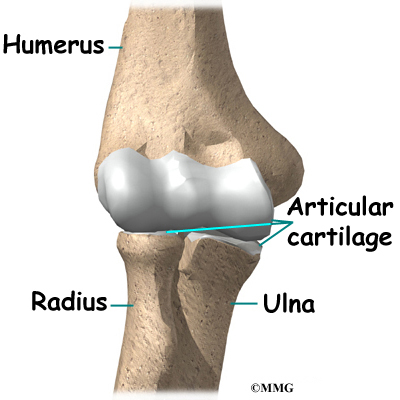
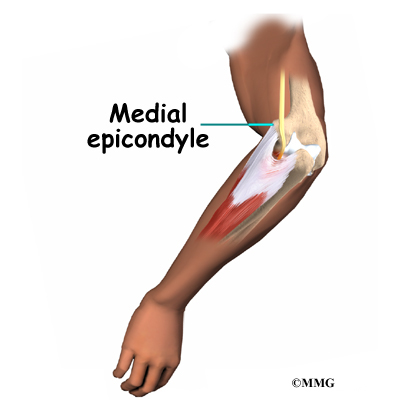
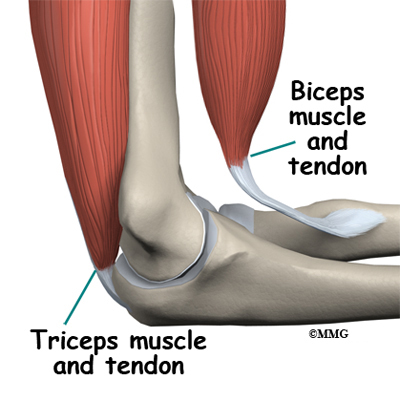
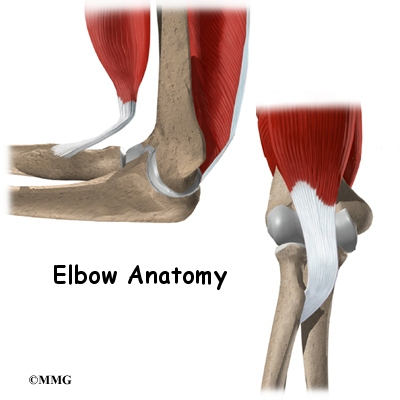
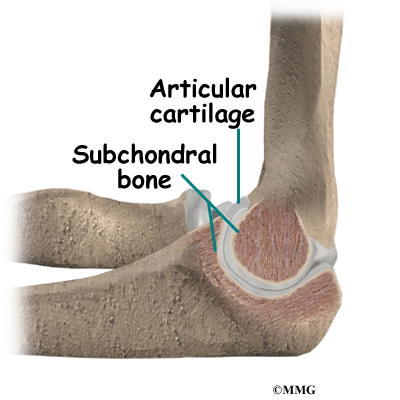
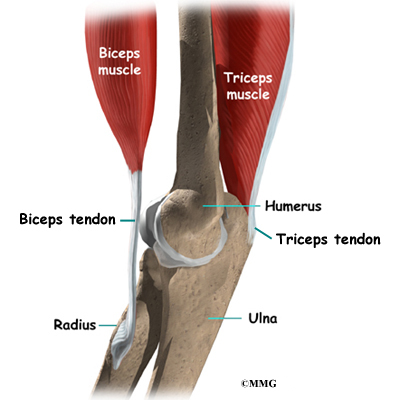
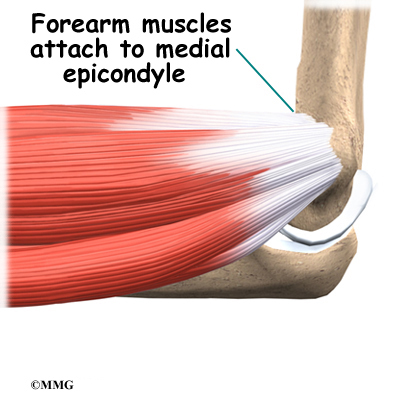
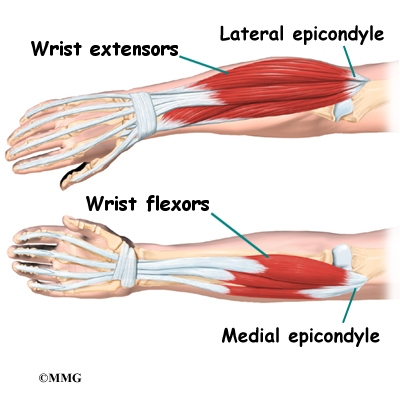
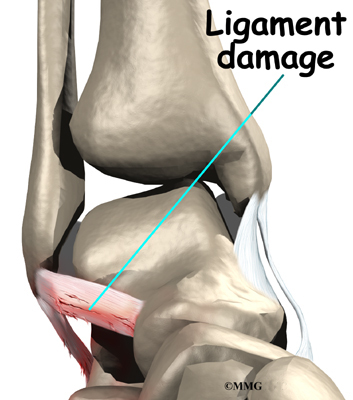
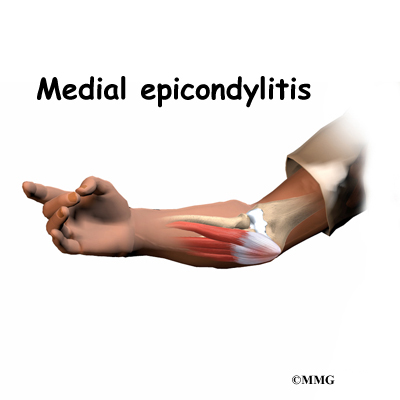
Golfer’s elbow causes pain that starts on the inside bump of the elbow, the medial epicondyle. Wrist flexors are the muscles of the forearm that pull the hand forward. The wrist flexors are on the palm side of the forearm. Most of the wrist flexors attach to one main tendon on the medial epicondyle. This tendon is called the common flexor tendon.
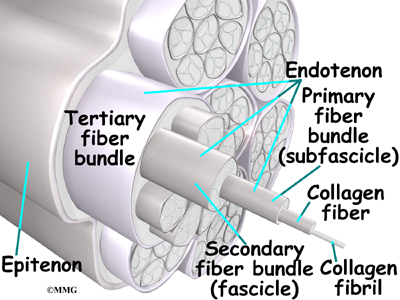
Tendons connect muscle to bone. Tendons are made up of strands of a material called collagen. The collagen strands are lined up in bundles next to each other.
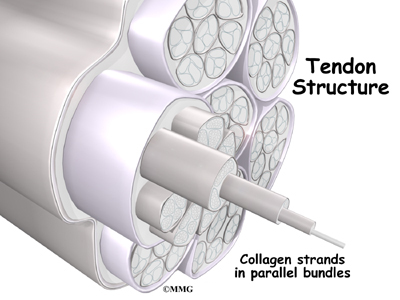
Because the collagen strands in tendons are lined up, tendons have high tensile strength. This means they can withstand high forces that pull against both ends of the tendon. When muscles work, they pull on one end of the tendon. The other end of the tendon pulls on the bone, causing the bone to move.
The wrist flexor muscles contract when you flex your wrist, twist your forearm down, or grip with your hand. The contracting muscles pull on the flexor tendon. The forces that pull on the tendon can build when you grip a golf club during a golf swing or do other similar actions.
Causes
Why did I develop golfer’s elbow?
Overuse of the muscles and tendons of the forearm and elbow are the most common reason people develop golfer’s elbow. Repeating some types of activities over and over again can put too much strain on the elbow tendons. These activities are not necessarily high-level sports competition. Shoveling, gardening, and hammering nails can all cause the pain of golfer’s elbow. Swimmers who try to pick up speed by powering their arm through the water can also strain the flexor tendon at the elbow.

In some cases, the symptoms of golfer’s elbow are due to inflammation. In an acute injury, the body undergoes an inflammatory response. Special inflammatory cells make their way to the injured tissues to help them heal. Conditions that involve inflammation are indicated by -itis on the end of the word. For example, inflammation in a tendon is called tendonitis. Inflammation around the medial epicondyle is called medial epicondylitis.
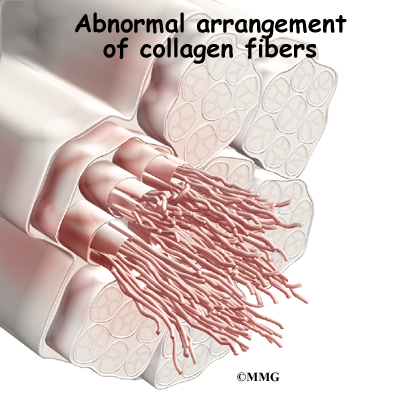
However, golfer’s elbow often is not caused by inflammation. Rather, it is a problem within the cells of the tendon. Doctors call this condition tendonosis. In tendonosis, wear and tear is thought to lead to tissue degeneration. A degenerated tendon usually has an abnormal arrangement of collagen fibers.
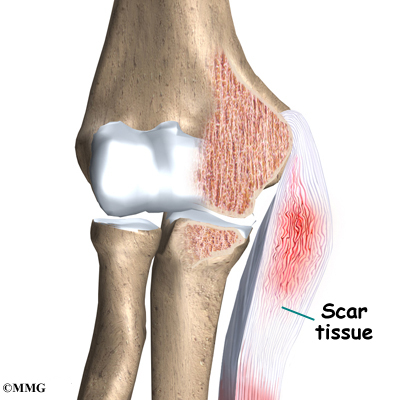
Instead of inflammatory cells, the body produces a type of cells called fibroblasts. When this happens, the collagen loses its strength. It becomes fragile and can break or be easily injured. Each time the collagen breaks down, the body responds by forming scar tissue in the tendon. Eventually, the tendon becomes thickened from extra scar tissue.
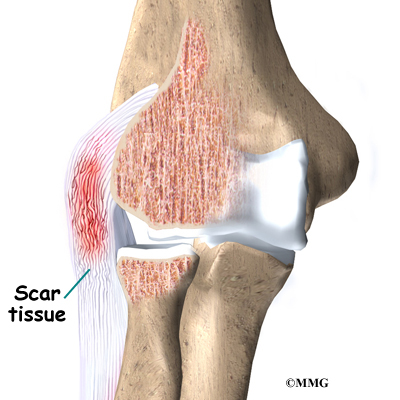
No one really knows exactly what causes tendonosis. Some doctors think that the forearm tendon develops small tears with too much activity. The tears try to heal, but constant strain and overuse keep re-injuring the tendon. After a while, the tendons stop trying to heal. The scar tissue never has a chance to fully heal, leaving the injured areas weakened and painful.
Symptoms
What does golfer’s elbow feel like?
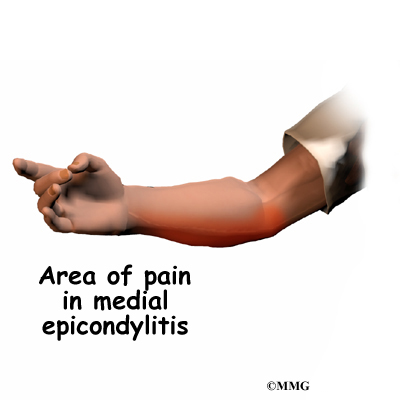
The main symptom of golfer’s elbow is tenderness and pain at the medial epicondyle of the elbow. Pain usually starts at the medial epicondyle and may spread down the forearm. Bending your wrist, twisting your forearm down, or grasping objects can make the pain worse. You may feel less strength when grasping items or squeezing your hand into a fist.
Diagnosis
How can my doctor be sure I have golfer’s elbow?
Your doctor will first take a detailed medical history. You will need to answer questions about your pain, how your pain affects you, your regular activities, and past injuries to your elbow.
The physical exam is often most helpful in diagnosing golfer’s elbow. Your doctor may position your wrist and arm so you feel a stretch on the forearm muscles and tendons. This is usually painful with golfer’s elbow. Other tests for wrist and forearm strength are used to help your doctor diagnose golfer’s elbow.
You may need to get X-rays of your elbow. The X-rays mostly help your doctor rule out other problems with the elbow joint. The X-ray may show if there are calcium deposits on the medial epicondyle at the connection to the flexor tendon.
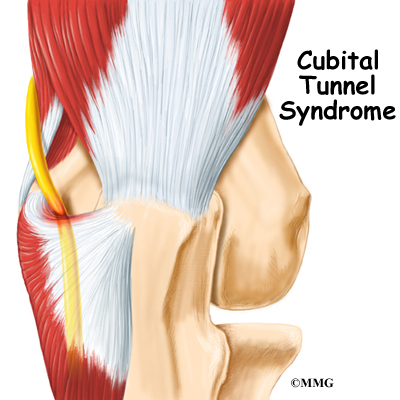
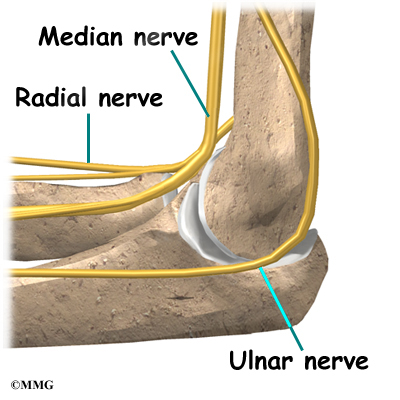
Golfer’s elbow symptoms are very similar to a condition called cubital tunnel syndrome. This condition is caused by a pinched ulnar nerve as it crosses the elbow on its way to the hand. If your pain does not respond to treatments for golfer’s elbow, your doctor may suggest tests to rule out problems with the ulnar nerve.
Related Document: A Patient’s Guide to Cubital Tunnel Syndrome
When the diagnosis is not clear, the doctor may order other special tests, such as a magnetic resonance imaging (MRI) scan or ultrasound. An MRI scan uses magnetic waves to create pictures of the elbow in slices. The MRI scan shows tendons as well as bones.
Ultrasound tests use high-frequency sound waves to generate an image of the tissues below the skin. As the small ultrasound device is rubbed over the sore area, an image appears on a screen. This type of test can sometimes show collagen degeneration.
Treatment
How can I make my pain go away?
Nonsurgical Treatment
The key to nonsurgical treatment is to keep the collagen from breaking down further. The goal is to help the tendon heal.
If the problem is caused by inflammation, anti-inflammatory medications such as ibuprofen may give you some relief. If inflammation doesn’t go away, your doctor may inject the elbow with cortisone. Cortisone is a powerful anti-inflammatory medication. Its benefits are temporary, but they can last for a period of weeks to several months.
Shock wave therapy is a newer form of nonsurgical treatment. It uses a machine to generate shock wave pulses to the sore area. Patients generally receive the treatment once each week for up to three weeks. It is not known exactly why it works for golfer’s elbow, but recent studies indicate that this form of treatment can help ease pain, while improving range of motion and function.
Doctors commonly have their patients with golfer’s elbow work with a physical or occupational therapist. At first, your therapist will give you tips on how to rest your elbow and how to do your activities without putting extra strain on your elbow. Your therapist may apply tape to take some of the load off the elbow muscles and tendons. You may use an elbow strap that wraps around the upper forearm in a way that relieves the pressure on the tendon attachment.
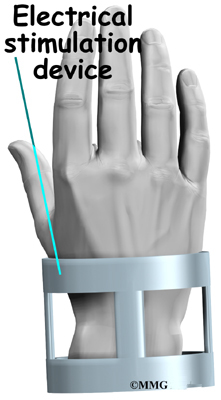
Your therapist may apply ice and electrical stimulation to ease pain and improve healing of the collagen. Therapy sessions may also include iontophoresis, which uses a mild electrical current to push anti-inflammatory medicine to the sore area. This treatment is especially helpful for patients who can’t tolerate injections. Exercises are used to gradually stretch and strengthen the forearm muscles.
Because tendonosis is often linked to overuse, your therapist will work with you to reduce repeated strains during activity. When symptoms are from a particular sport or work activity, your therapist will observe your style and motion with the activity. Your therapist may suggest ways to protect the elbow during your activities. Your therapist can also check your sports equipment and work tools and recommend ways to alter them to keep your elbow safe.
Surgery
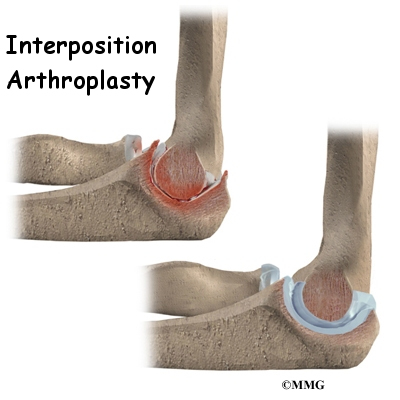
Sometimes nonsurgical treatment fails to stop the pain or help patients regain use of the elbow. In these cases, surgery may be necessary.
Tendon Debridement
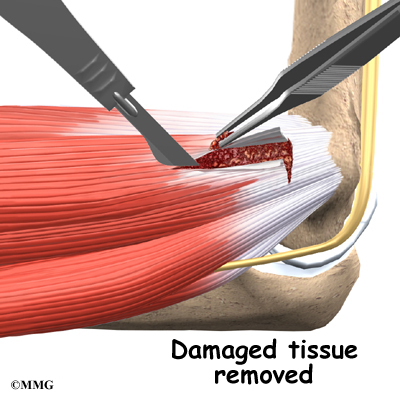
When problems are caused by tendonosis, surgeons may choose to take out (debride) only the affected tissues within the tendon. In these cases, the surgeon cleans up the tendon, removing only the damaged tissue.
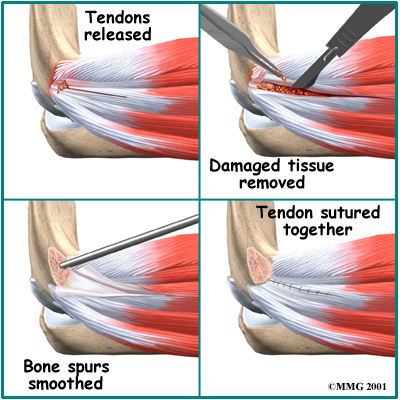
Tendon Release
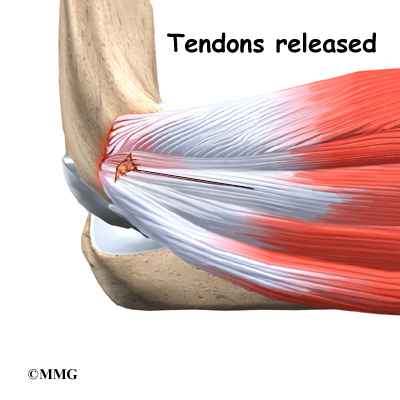
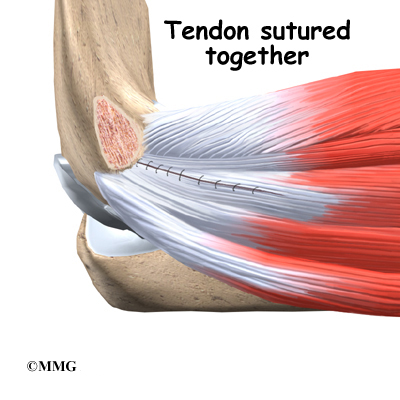
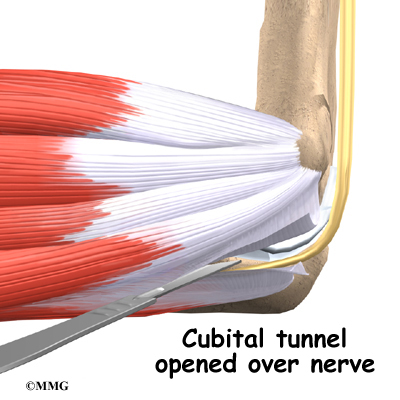
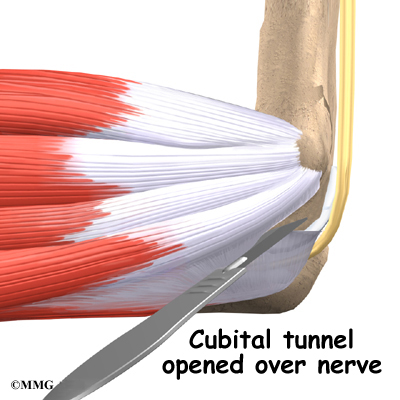
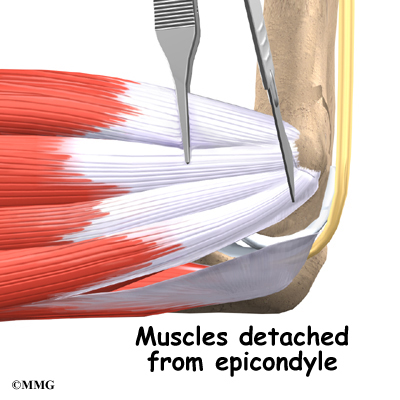
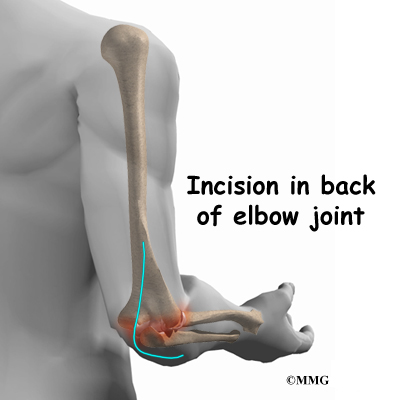
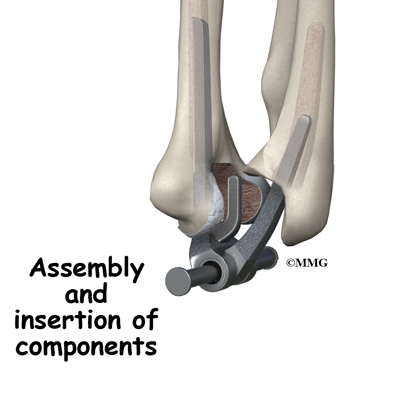
A commonly used surgery for golfer’s elbow is called a medial epicondyle release. This surgery takes tension off the flexor tendon. The surgeon begins by making an incision along the arm over the medial epicondyle. Soft tissues are gently moved aside so the surgeon can see the point where the flexor tendon attaches to the medial epicondyle.
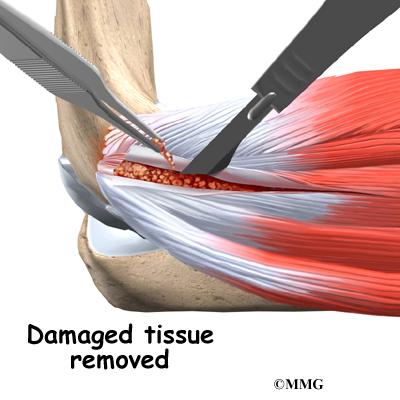
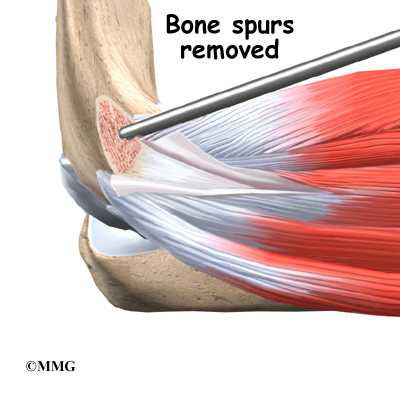
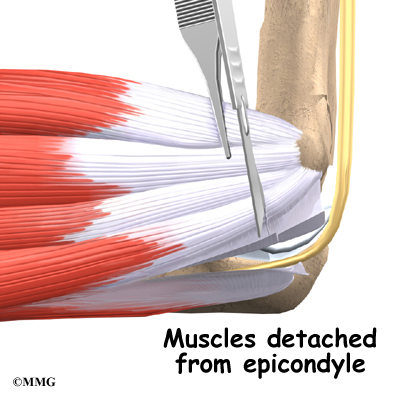
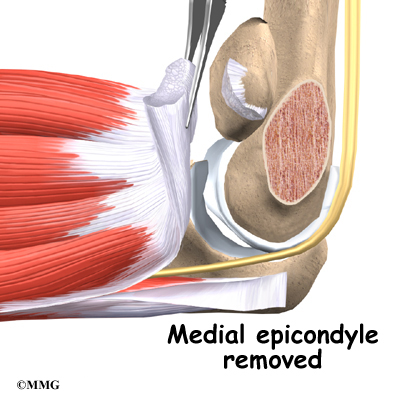
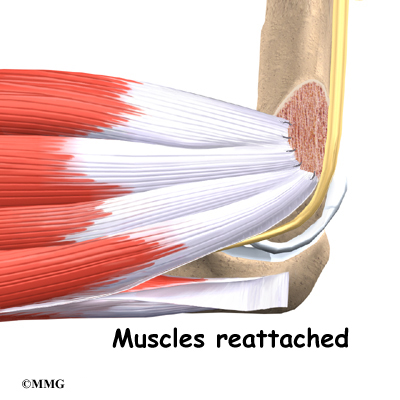
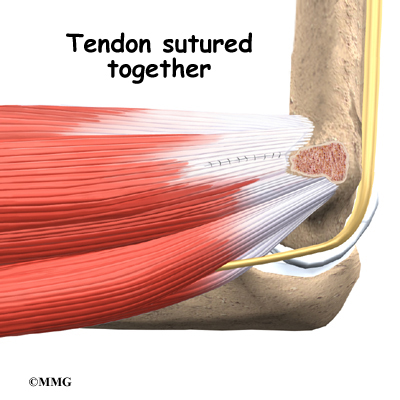
The flexor tendon is then cut where it connects to the medial epicondyle. The surgeon splits the tendon and takes out any extra scar tissue. Any bone spurs found on the medial epicondyle are removed. (Bone spurs are pointed bumps that can grow on the surface of the bones.) Some surgeons suture the loose end of the tendon to the nearby fascia tissue. (Fascia tissue covers the muscles and organs throughout your body.)
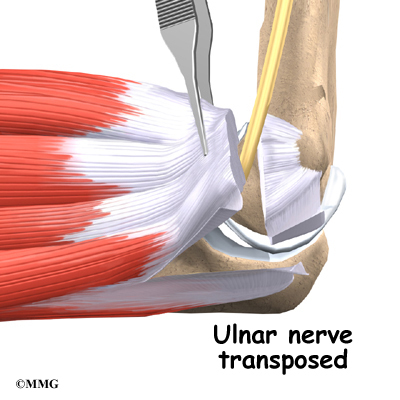
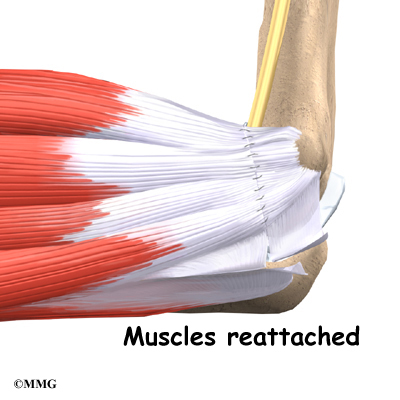
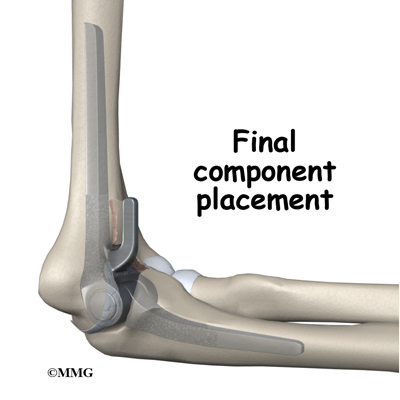
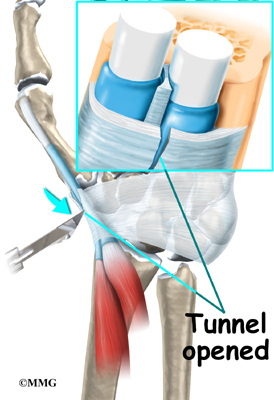
The following images show each step


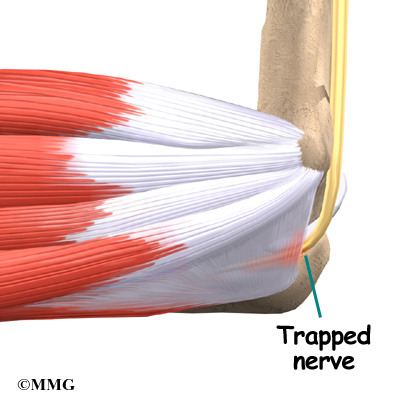
Your surgeon will look at the ulnar nerve, to make sure that it is not being pinched. If the nerve looks fine, the skin is then stitched together.
View animation of the Procedure
This surgery can usually be done on an outpatient basis, which means that you don’t have to stay overnight in the hospital. It can be done using a general anesthetic or a regional anesthetic. A general anesthetic puts you to sleep. A regional anesthetic blocks only certain nerves for several hours. For surgery on the elbow, you would most likely get an axillary block to numb your arm.
Rehabilitation
How soon can I use my elbow again?
Nonsurgical Rehabilitation
In cases where the tendon is inflamed, nonsurgical treatment is usually only needed for four to six weeks. When symptoms are from tendonosis, you can expect healing to take longer, usually up to three months. If the tendonosis is chronic and severe, complete healing can take up to six months.
After Surgery
Recovery from surgery takes longer. Immediately after surgery, your elbow is placed in a removable splint that keeps your elbow bent at a 90-degree angle. Ice and electrical stimulation treatments may be used during your first few therapy sessions to help control pain and swelling from the surgery. Your therapist may also use massage and other types of hands-on treatments to ease muscle spasm and pain.
You will gradually work into more active stretching and strengthening exercises. You just need to be careful to avoid doing too much, too quickly. Active therapy starts about two weeks after surgery. Your therapist may begin with light isometric strengthening exercises. These exercises work the muscles of the forearm without straining the healing tissues. You will use your own muscle power in active range-of-motion exercises.
At about six weeks, you start doing more active strengthening. As you progress, your therapist will give you exercises to help strengthen and stabilize the muscles and joints of the wrist, elbow, and shoulder. You’ll also do exercises to improve fine motor control and dexterity of the hand. Some of the exercises you’ll do are designed to work your hand and elbow in ways that are similar to your work tasks and sport activities. Your therapist will help you find ways to do your tasks that don’t put too much stress on your elbow.
You may need therapy for two to three months. It may take four to six months to get back to high-level sports and work activities. Before your therapy sessions end, your therapist will teach you a number of ways to avoid future problems.