A Patient’s Guide to Sternoclavicular Joint Problems
Introduction

The sternoclavicular (SC) joint is important because it helps support the shoulder. The SC joint links the bones of the arms and shoulder to the vertical skeleton.
Most SC joint problems are relatively minor. However, certain types of injuries require immediate medical attention.
This document will help you understand
- what the SC joint is
- what kinds of problems can develop at the SC joint
- what treatments are available
Anatomy
What does the SC joint look like?
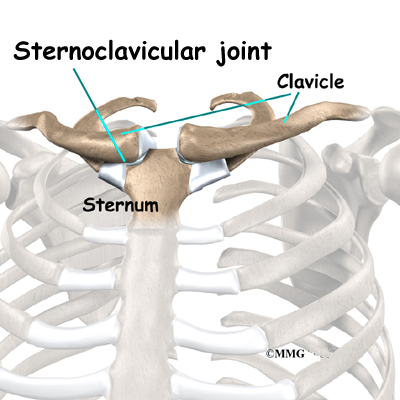
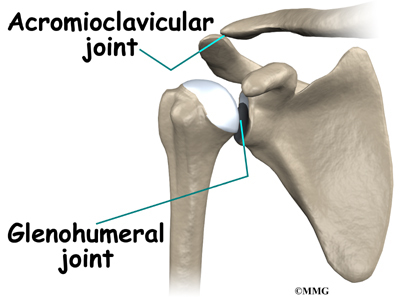
The SC joint connects your clavicle (collarbone) to your sternum, which is the large bone down the middle of your chest. This attachment is the only bony joint linking the bones of the arm and shoulder to the main part of the skeleton.
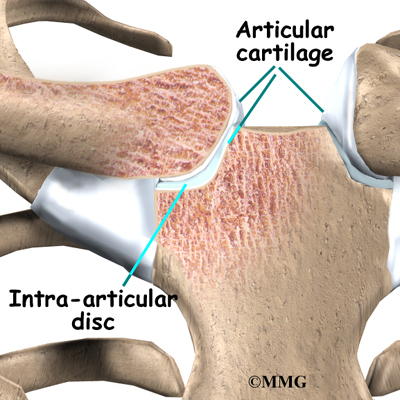
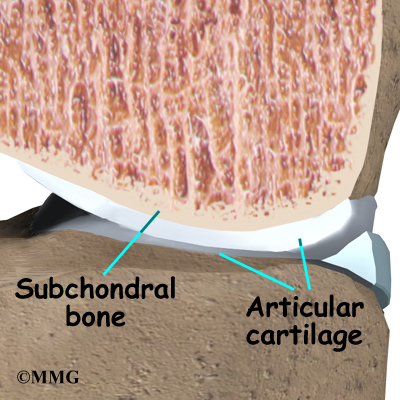
Like most joints, the SC joint is made up of two bones covered with a material called articular cartilage. Articular cartilage is a white, smooth material that covers the ends of bones in a joint. Articular cartilage allows the bones of a joint to rub together without much friction.
Only a small section of the SC joint actually connects to the sternum. This makes the bony connection somewhat unstable. However, extra ligaments cross the SC joint to give it more stability. Ligaments attach bones to other bones.
It seems like this construction would make SC joint dislocation common, but a dislocation is actually very rare. The ligaments surrounding the SC joint are extremely strong. These ligaments are very effective at preventing dislocations. Four different types of ligaments hold the joint in place.

- The intra-articular disc ligament attaches to the first rib and divides the joint into two separate spaces. This ligament is very thick and fibrous.
- The costoclavicular ligament is short and strong. It attaches underneath the clavicle to the first rib just below. It helps steady the SC joint during certain motions.
- The interclavicular ligament supports the ends of both clavicle bones near the SC joint. It passes over the top of the sternum, connecting one clavicle to the other.
- The capsular ligament reinforces the capsule that surrounds the SC joint. This ligament keeps the sternum end of the clavicle from pointing up as the other end of the clavicle drops down.
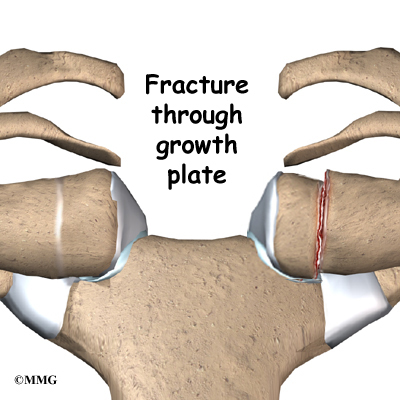
A part of the clavicle called the physis does not turn into bone until you are about 25 years old. The physis is a section of cartilage near the end of the clavicle. Bone growth occurs at a physis, which is also called a growth plate. Between age 20 and 25, the cartilage physis fuses into bone. Injuries to the physis in people under 25 may look like an SC joint dislocation. But sometimes the injury is actually a fracture through the growth plate.
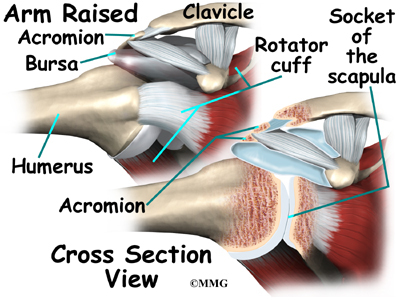
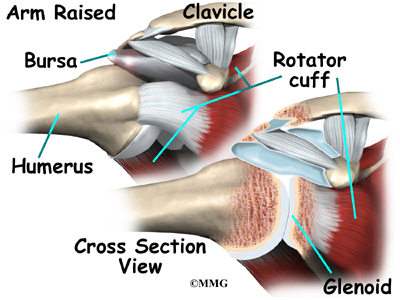
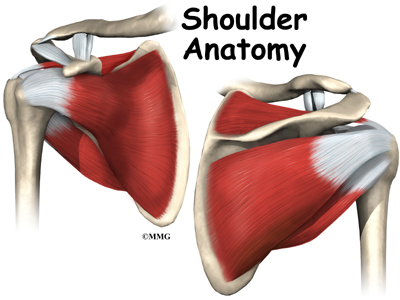
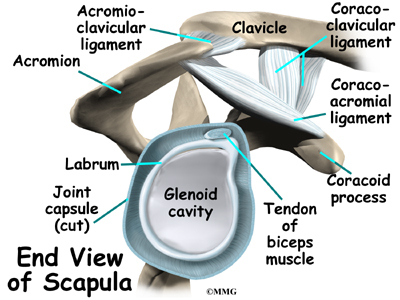
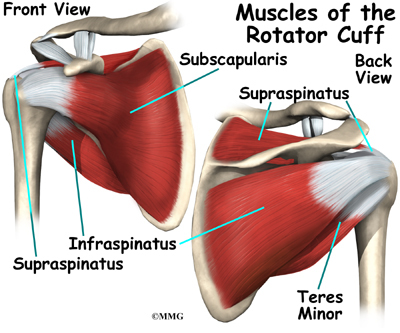
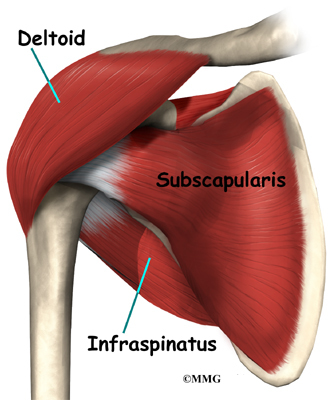
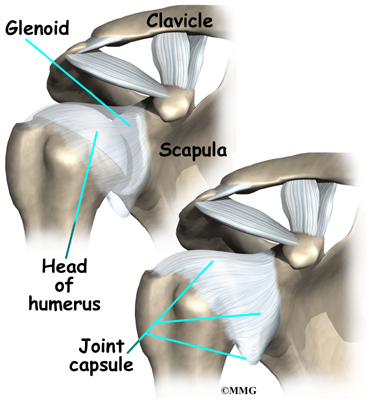
Related Document: A Patient’s Guide to Shoulder Anatomy
Causes
What causes SC joint injuries?
The SC joint is one of the least commonly dislocated joints in the body. Car accidents cause nearly half of all SC dislocations. Sports injuries cause about 20 percent. Falls and other types of accidents cause the rest. These sorts of traumatic injuries can also cause injuries to the physis in people under 25 years old.
Indirect force causes most injuries to the SC joint. Indirect force involves something hitting the shoulder very hard. The shoulder is pushed in and rolled either forward or backward, affecting the SC joint.
When the SC joint is dislocated, it is usually an anterior dislocation. This means that the clavicle is pushed forward, in front of the sternum. Dislocating in the opposite direction is less common because the ligaments on the back side of the joint are so strong.

Direct force against the front of the clavicle can push the end of the clavicle behind the sternum, into the area between the lungs. This is called a posterior dislocation. It takes a lot of force to cause a posterior dislocation due to the strength of the ligaments behind the joint.
Posterior dislocations can be very dangerous, because the area behind the sternum contains vital organs and tissues. The heart and its large vessels, the trachea, the esophagus, and lymph nodes can all be seriously damaged in a posterior dislocation of the SC joint. This can cause life-threatening injuries to the heart and lungs. Immediate medical help is required to get the SC joint back into position after a posterior dislocation.
Symptoms
What does an SC joint injury feel like?
Different SC joint problems have different symptoms.
Dislocation
You will know immediately if your SC joint has dislocated. Dislocation causes severe pain that gets worse with any arm movements.In anterior dislocation, the end of the clavicle juts out near the sternum. This causes a hard bump in the middle of the chest. In posterior dislocation, a bump is usually not obvious. The joint will feel different to your doctor. Posterior dislocations can cause difficulty breathing, shortness of breath, or a feeling of choking. Some patients have trouble swallowing or have a tight feeling in their throats.
Sprains
Sometimes force may only sprain the SC joint. Mild sprains cause pain, but the joint is still stable. In moderate sprains, the joint becomes unstable.
Ligament Injury
In rare cases, patients have a stable joint but a painful clicking, grating, or popping feeling. This indicates an injury to the intra-articular disc ligament. This type of injury causes pain and problems moving the SC joint.
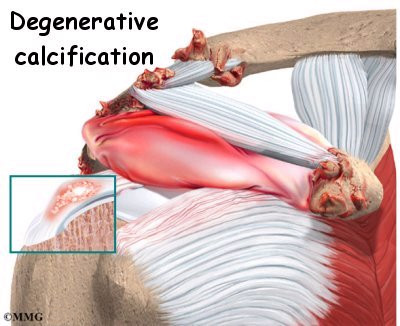
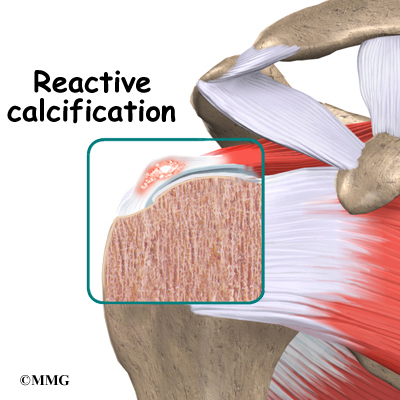
Degenerative Arthritis
Osteoarthritis is a type of degenerative arthritis that tends to get worse with age. Injury to a joint can result in the development of osteoarthritis. Osteoarthritis eventually causes pain and stiffness. Usually these symptoms go away with anti-inflammatory medications, rest, and heat. If the symptoms last for six to 12 months, some type of surgical treatment may eventually be needed.
Diagnosis
What tests will my doctor run?
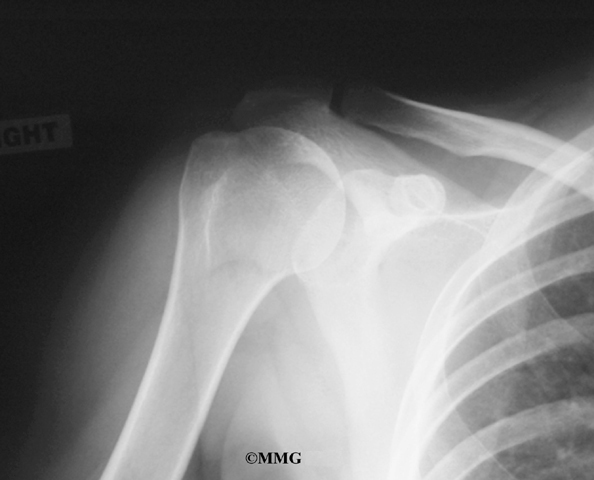
Diagnosis begins with a complete history and physical examination. Usually the doctor is suspicious of an injury to the SC joint when there is pain and swelling over the joint. The joint may look deformed.
You will need to get an X-ray. Special X-rays can show your doctor both the clavicles and SC joints. Your doctor may also want to get a computerized tomography (CT) scan. CT scans show bones and soft tissues such as ligaments and tendons. CT scans are more precise than X-rays. They can help your doctor more clearly see the problem in your SC joint.
Treatment
What treatment options are available?
Nonsurgical Treatment
The treatment your doctor recommends will depend on the type of injury to your joint.
Sprains
A mild sprain usually gets better by resting the joint for two to three days. Ice packs can be placed on the sore joint for 15 minutes at a time during the first few days after the injury.
Moderate sprains may require some help to get the joint back into position. A figure-eight strap wraps around both shoulders to support the SC joint. Patients with a moderate sprain may need to wear this type of strap for four to six weeks. The strap protects the joint from another injury and lets the injured ligaments heal and become strong again.
Anterior Dislocation
Doctors have different ways of treating anterior dislocation. Some feel that surgery is needed when the dislocation is severe. Most doctors treat the anterior dislocation by letting it heal where it is or by performing a closed reduction.
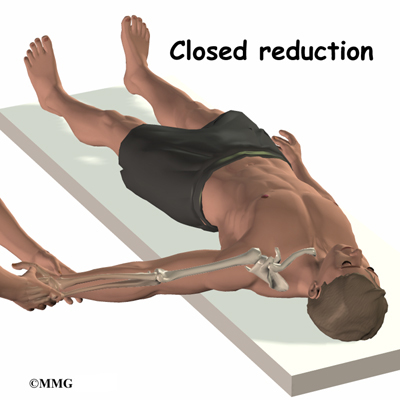
Closed reduction involves pulling, pushing, and moving the clavicle until it pops back into joint. It can be very painful. Most patients are given general anesthesia before the procedure, or at least some form of muscle relaxant. The intense pain and muscle spasms caused by the dislocation can make reduction almost impossible without some form of anesthesia.
After closed reduction for anterior dislocation, your SC joint will need to be held perfectly still. Moving the SC joint will cause pain and may even dislocate the joint again. Your doctor will probably recommend that you take pain medication and wear a figure-eight strap for at least six weeks.
Posterior Dislocation
If your doctor suspects posterior dislocation, you will need to have a complete physical examination right away. A series of X-rays and CT scans will be needed. It is important that your doctor have as much information as possible about what organs may be affected by the dislocation.
Doctors almost always use closed reduction to treat posterior dislocations. This requires general anesthesia, because of the pain and muscle spasms. The most common type of closed reduction involves lying on your back, with your dislocated joint near the edge of the table. The arm is pulled out and then brought back into place. You can usually hear the clavicle pop back into joint. Sometimes doctors need to grab the clavicle and pull it out from behind the sternum. If this doesn’t work, a special kind of clip is used to pull the clavicle out.
A figure-eight strap is used for at least six weeks after closed reduction for a posterior dislocation of the SC joint.
Sometimes closed reduction for a posterior dislocation does not work, or SC joint problems become chronic. In these cases, adult patients may need surgery. The risk of harm to your heart, lungs, and other organs behind the sternum is too high. Posterior dislocation has been known to cause a ruptured esophagus, laceration of major veins, and pressure on major arteries, among other complications. These problems can kill you. Posterior dislocation has also been known to cause hoarseness, a sudden onset of snoring, and voice changes with arm movement.
Most of the time the goal of surgery is to stabilize the SC joint. When the ligaments are too severely damaged, the clavicle is surgically attached to the rib instead of the sternum. The joint will still probably be unstable, but the displaced clavicle no longer compresses the organs behind the sternum.
Growth Plate Injuries
Injuries to the growth plate of the clavicle usually heal without treatment. (As mentioned earlier, the growth plate is a section of cartilage near the end of the clavicle where bone growth occurs.) Only rare cases require surgery. In younger children, the growth of the bone will remodel the fractured bone. Remodeling actually causes the collarbone to straighten as the child grows. In young adults, there is less of this straightening effect because their bone growth is nearly complete.
Osteoarthritis
Osteoarthritis of the SC joint usually responds to treatments such as rest, ice, physical or occupational therapy, and anti-inflammatory medications. If the symptoms of osteoarthritis do not respond to basic treatment over six to 12 months, surgery may be needed.
Surgery
If nonsurgical measures fail to relieve your pain, you may need surgery.
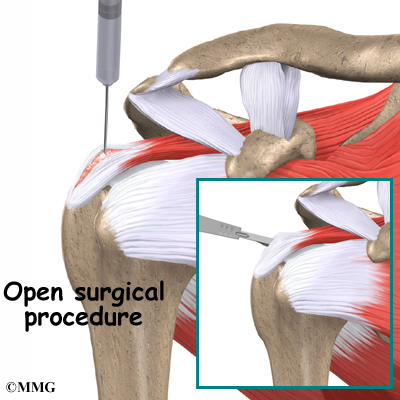
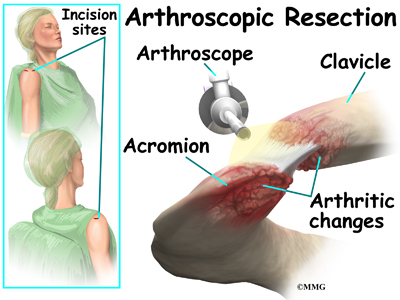
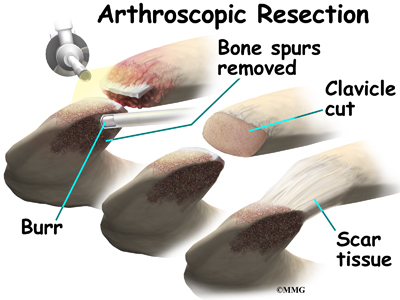
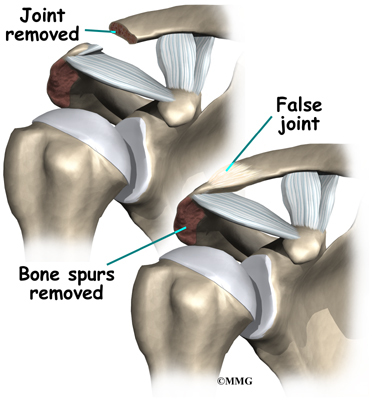
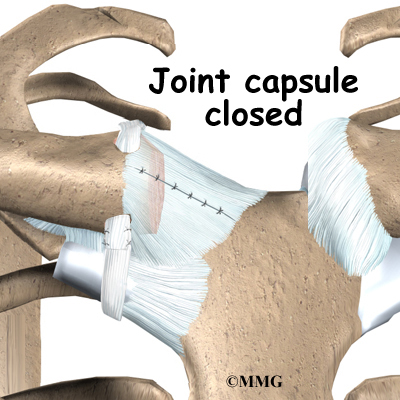
Resection Arthroplasty
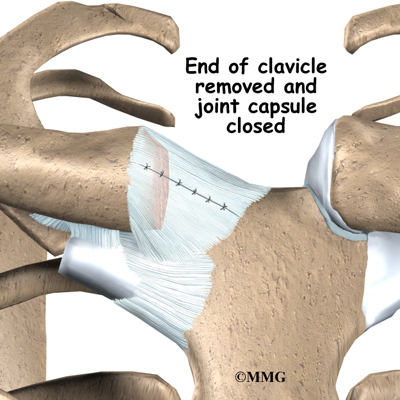
The most common procedure for SC joint osteoarthritis is resection arthroplasty. A resection arthroplasty involves removing the surface of the clavicle next to the sternum. This keeps the arthritic bone surfaces from rubbing on one another. The remaining end of the clavicle eventually attaches to the rib with scar tissue. This stops the end of the clavicle from moving around when you move your arm.
Graft Method

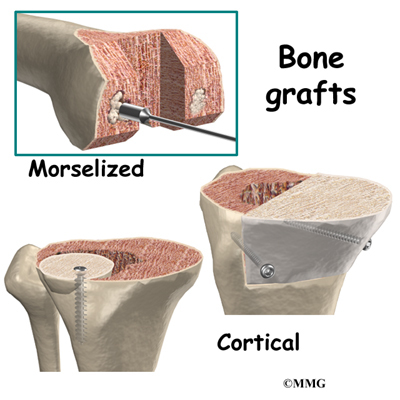
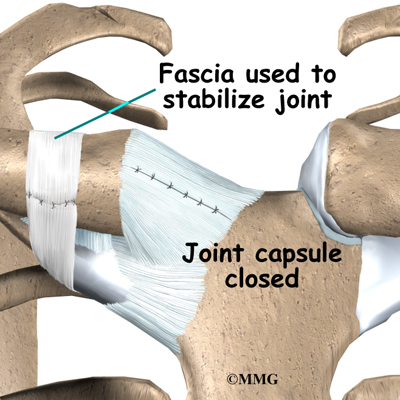
Your surgeon will try to keep from disturbing the ligaments around the SC joint. But if the ligaments are damaged and loose, a tendon graft may be used to tighten the connection between the end of the clavicle and the first rib. Surgeons use a piece of tendon taken from the wrist or a piece of fascia taken from the thigh. These are referred to as tendon grafts or fascia grafts. The graft is then sewn through the end of clavicle and connected to the first rib.
Surgeons prefer not to use metal pins or wire to fix an unstable SC joint. These implants could puncture the vital organs behind the SC joint.
Rehabilitation
What should I expect after treatment?
Nonsurgical Rehabilitation
If you don’t need surgery, you should start range-of-motion exercises as pain eases, followed by a program of strengthening. At first, exercises are done with the arm below shoulder level. The program advances to include strength exercises for the rotator cuff and shoulder blade muscles. The goal is to get your shoulder moving smoothly. Your physical or occupational therapist will give you tips on controlling your symptoms, which may include using tape to help hold the SC joint in place. You will probably progress to a home program within four to six weeks.
After Surgery
Your surgeon may have you wear a sling to support and protect the shoulder for a few days. A physical or occupational therapist will probably direct your recovery program. The first few therapy treatments will focus on controlling the pain and swelling from surgery. Ice and electrical stimulation treatments may help. Your therapist may also use massage and other types of hands-on treatments to ease muscle spasm and pain.
Therapy can progress safely and quickly after a simple arthroscopic resection. Treatments start out with range-of-motion exercises and gradually work into active stretching and strengthening. You need to avoid doing too much, too quickly.
Therapy goes slower after surgeries that require a tissue graft. Your arm is usually placed in a sling to prevent shoulder movement for several weeks. After this time, you’ll begin with passive exercises. During passive exercises, the shoulder joint is moved, but your muscles stay relaxed. Your therapist gently moves your joint and gradually stretches your arm. You may be taught how to do passive exercises at home.
Active therapy starts four to six weeks after graft surgery. Active range-of-motion exercises help you regain shoulder movement using your own muscle power. You might begin with light isometric strengthening exercises. These exercises work the muscles without straining the healing joint.
At about six weeks, you will start more active strengthening. These exercises focus on improving strength and control of the rotator cuff muscles and the muscles around the shoulder blade.
Some of the exercises you’ll do are designed to get your shoulder working in ways that are similar to your work tasks and sport activities. Your therapist will help you find ways to do your tasks that don’t put too much stress on your shoulder. Before your therapy sessions end, your therapist will teach you a number of ways to avoid future problems.